Wedding Decor Planning Guide
Planning wedding decor can feel big. So many colors. So many details. So many decisions.
But when you break it into small steps, it becomes simple and even fun.
This wedding decor planning guide walks you through each stage. From mood boards to vendor timelines. From layout sketches to final walkthrough. You’ll know exactly what to do, when to do it, and why it matters.
Let’s build your dream setting step by step.
1. Map Color Mood Boards


Start with color. It sets the whole tone. Choose 2–3 main colors and one accent. Pull fabric swatches, flower samples, and table linen photos. Save images that give you the same feeling. Not just the same color. This keeps your decor balanced and calm instead of busy and confusing.
- Pick one base color (like ivory or soft beige)
- Add one main tone (dusty blue, sage, blush)
- Choose one pop accent (gold, deep green, rust)
- Match florals with fabric textures
- Keep lighting tone in mind (warm or cool)
Pro tip: Print your palette and carry it when shopping.
Why it works: Clear color direction avoids random decor buys.
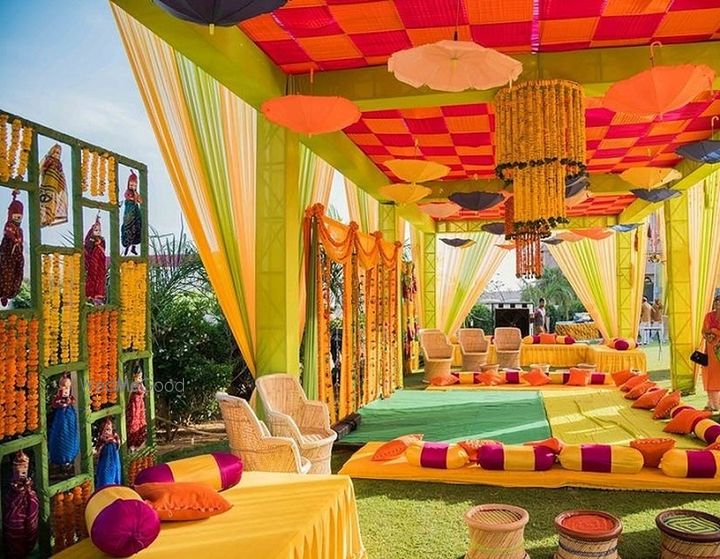
2. Define Wedding Theme Direction


Your theme shapes every decor decision. Rustic feels warm and wood-heavy. Modern feels clean and simple. Boho feels relaxed and layered. Don’t mix too many styles. Choose one main direction and add small personal touches inside it.
If you need help deciding, explore different wedding theme ideas.
- Choose one main theme style
- Write 3 words that describe your vibe
- Align flowers, signage, and linens with theme
- Match chair and table style
- Keep consistency from ceremony to reception
Pro tip: Ask, “Does this fit our 3 theme words?” before buying.
Why it works: Consistency makes photos look polished.
3. Sketch Venue Layout Zones

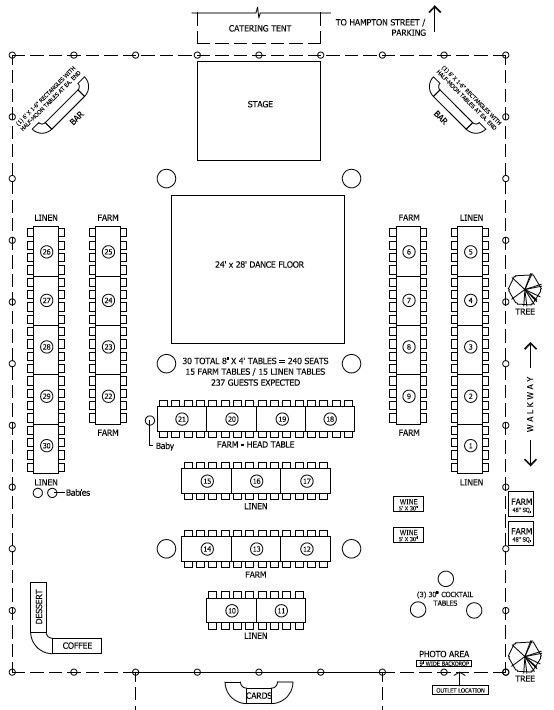


Take your venue floor plan and divide it into zones. Ceremony area. Cocktail space. Dining area. Dance floor. Photo backdrop. Guest flow matters. People should move easily without crowding.
Draw a simple map on paper. It does not need to be perfect. It just needs to show where decor will go.
- Mark entry and exit points
- Leave clear walking paths
- Avoid blocking view of stage
- Keep buffet and bar separate
- Place photo booth away from speakers
Pro tip: Visit venue at same time of day as wedding.
Why it works: You understand light and space better.
4. Break Down Decor Budget


Now talk money. Split decor into categories. Florals. Rentals. Lighting. Signage. Backdrops. Small details. Give each a rough percentage. Don’t spend all on centerpieces and forget lighting.
You can use a full decor checklist to organize every item clearly.
- Allocate 40% to florals and large visuals
- 20% to lighting
- 15% to rentals
- 10% to signage and stationery
- Keep 10% emergency buffer
Pro tip: Always overestimate floral cost slightly.
Why it works: You avoid last-minute stress.
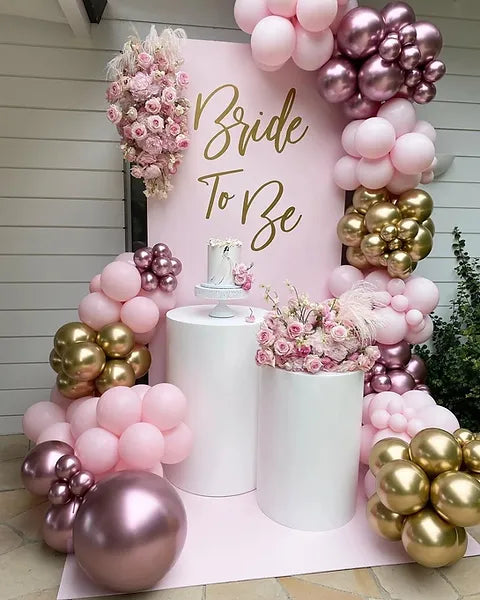
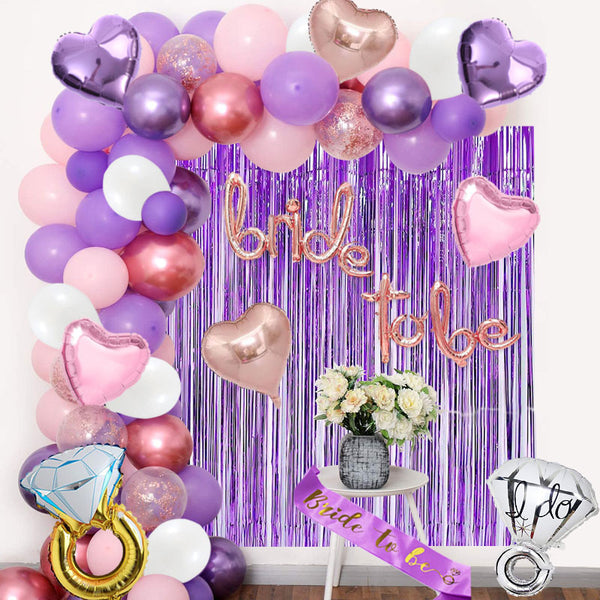
5. Mark Ceremony Focal Points


The ceremony is the emotional moment. Guests look at one main spot. That focal point must shine. It could be an arch, floral pillars, or a fabric backdrop.
Keep aisle decor simple but balanced. Too much blocks guest view.
- Design one strong altar feature
- Frame couple area with florals
- Keep aisle decor low height
- Match ceremony colors to reception
- Use symmetry for clean look
Pro tip: Repurpose ceremony florals for reception stage.
Why it works: You save budget and maintain design flow.
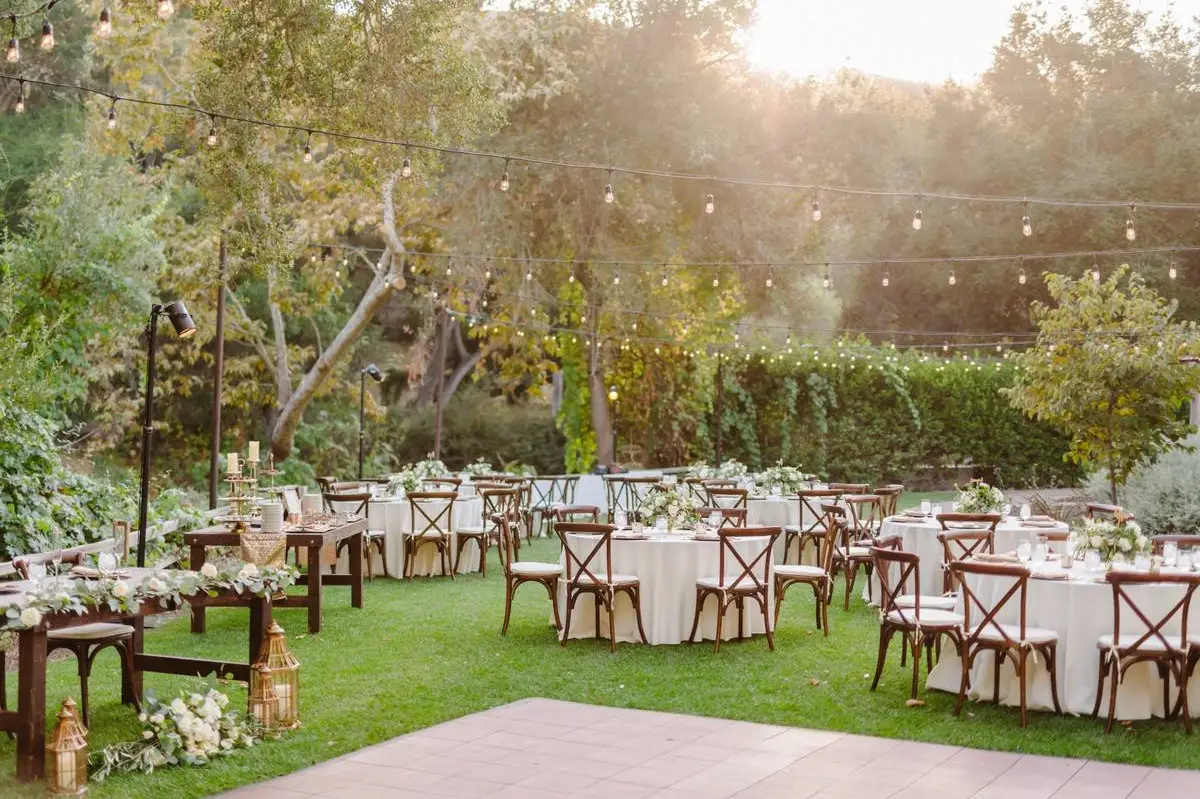
6. Plan Reception Table Flow


Tables fill most of your space. Choose round, long, or mixed layout. Keep enough space between tables for servers and guests.
Head table or sweetheart table? Decide early. It affects backdrop design.
- Leave at least 3 feet between tables
- Keep head table visible
- Balance tall and low centerpieces
- Align tablecloth length
- Avoid overcrowding centerpieces
Pro tip: Mix table shapes only if venue is large.
Why it works: Balanced spacing feels comfortable and luxe.
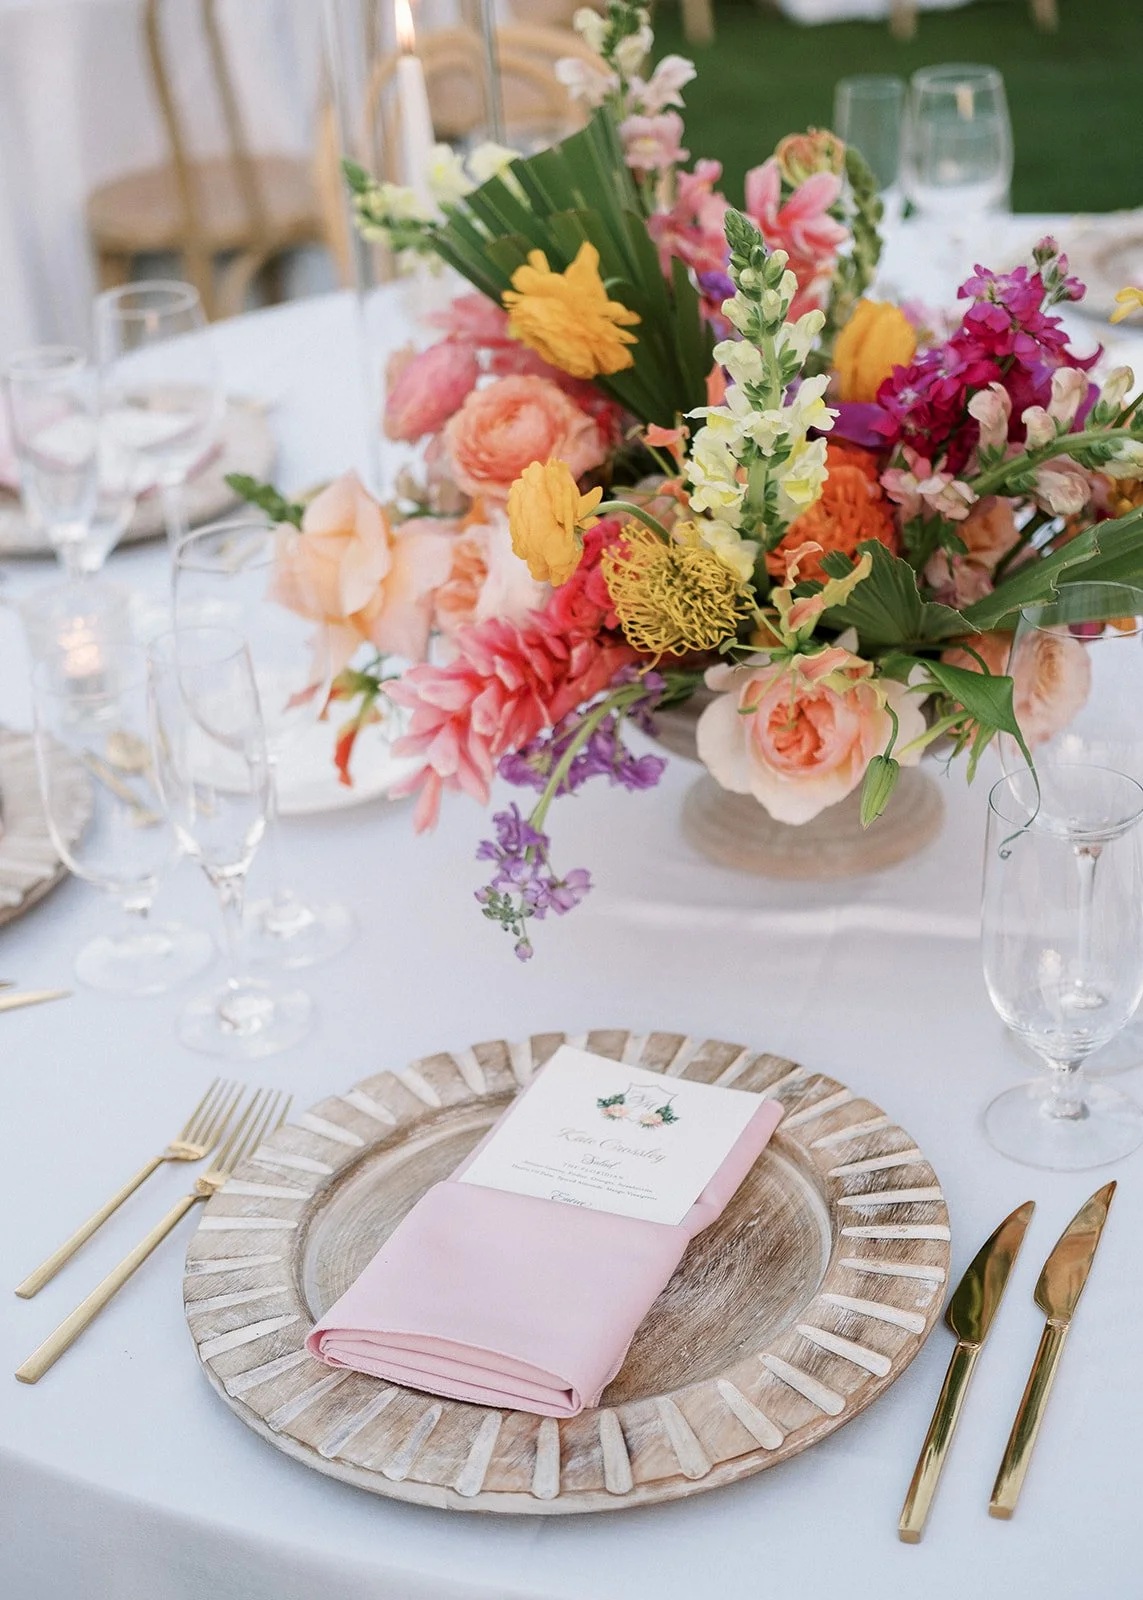
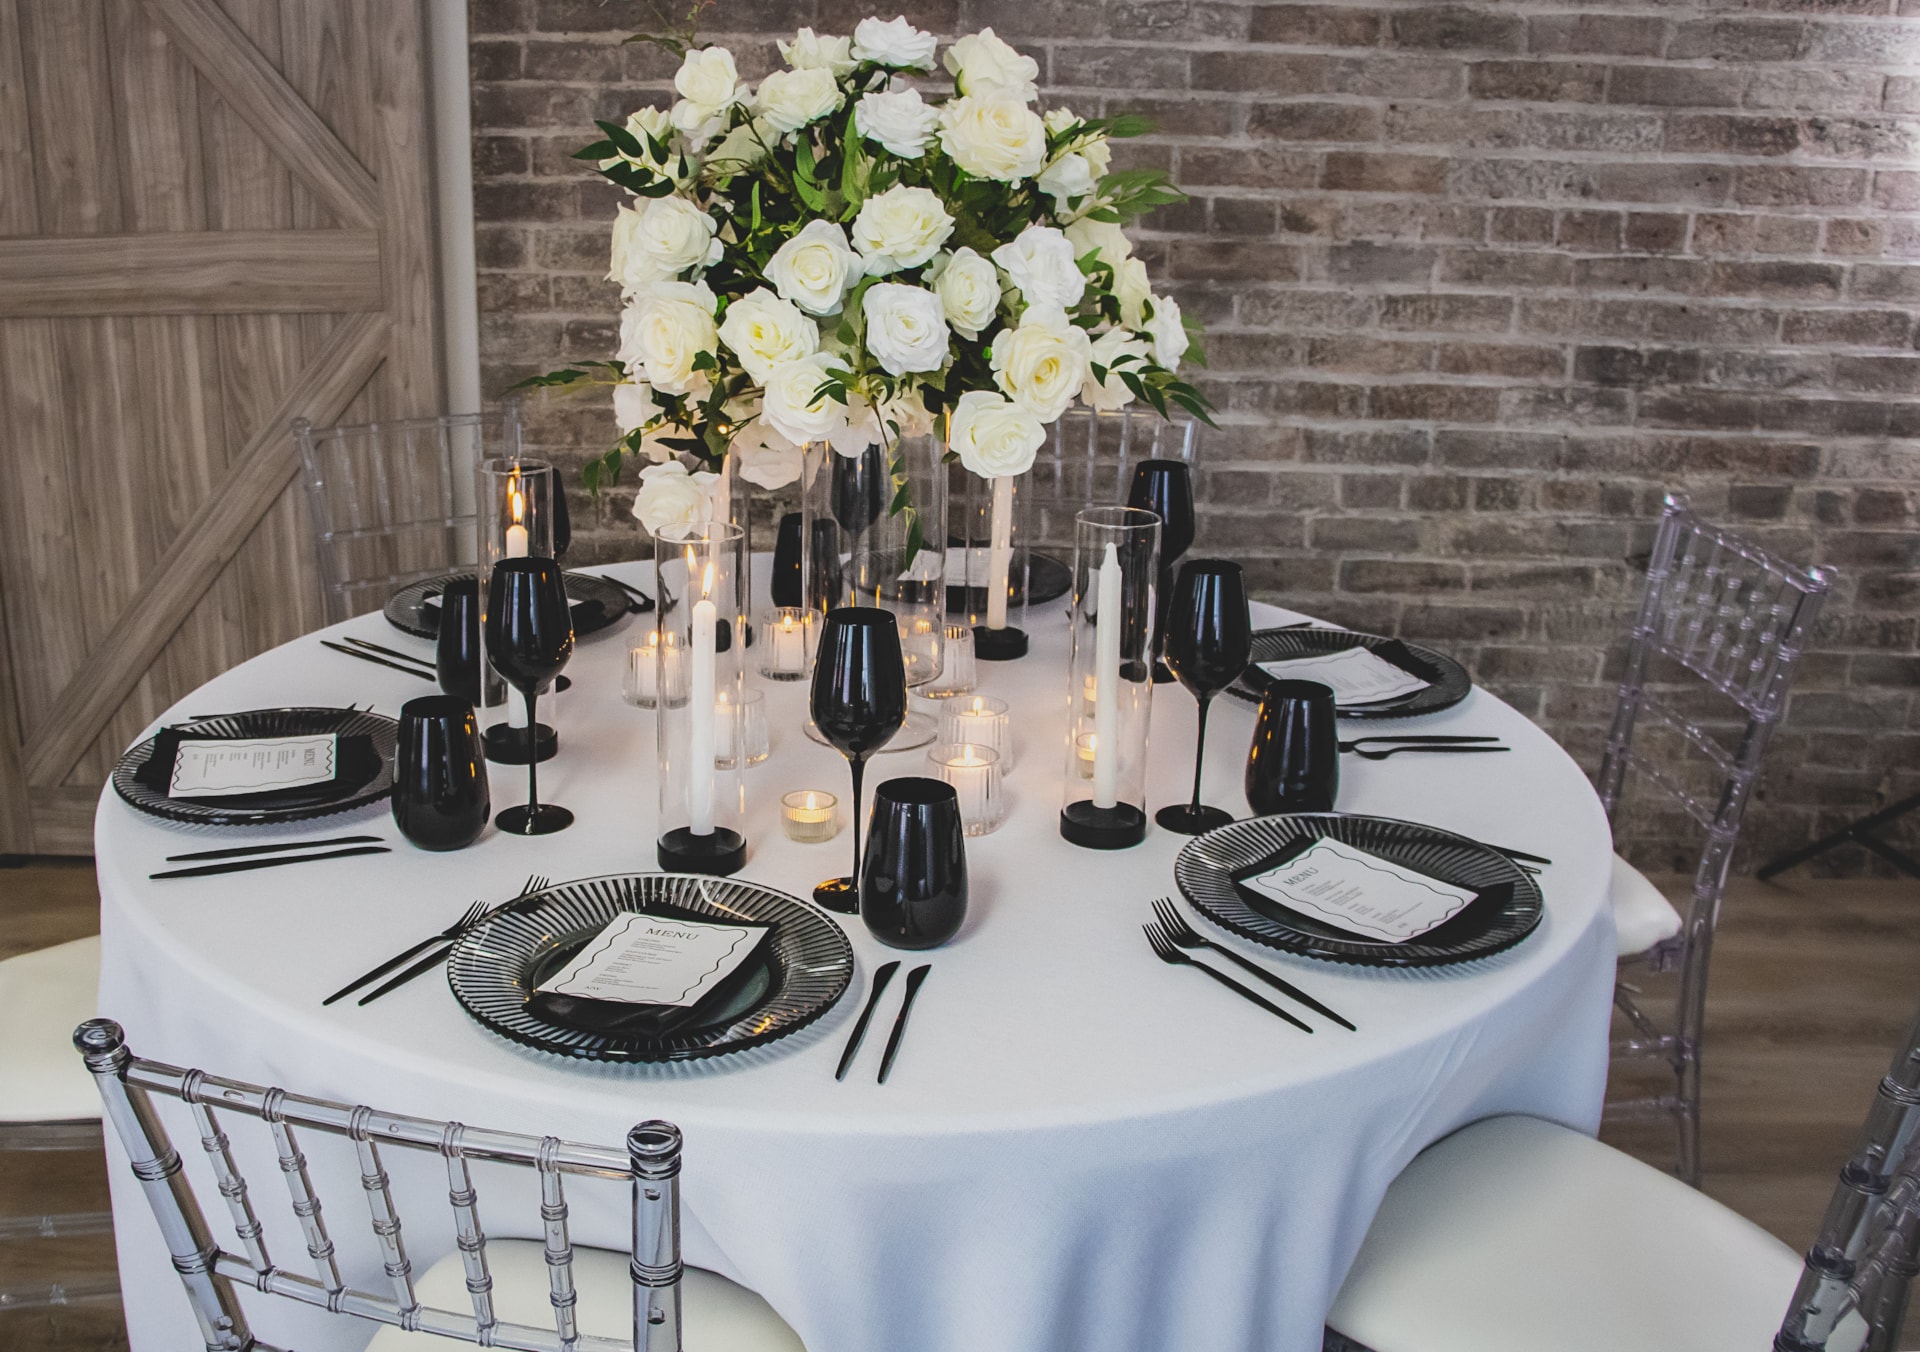
7. List Centerpiece Essentials


Centerpieces pull guests into the theme. But they should not block conversation. Height and proportion matter more than price.
Stick to 3–4 elements max. Too many items look cluttered.
- Floral arrangement
- Candle or soft lighting
- Table number
- Small greenery filler
- Clean charger plate
Pro tip: Test one full sample table before ordering all.
Why it works: You see scale in real life.
8. Map Lighting Placement Zones


Lighting changes everything. Even simple decor looks magical with warm lights. Plan where uplights, fairy lights, and candles will go.
Avoid harsh white lighting. Soft warm tones flatter skin and decor.
- Highlight backdrop with uplights
- Add string lights above dining area
- Use candles on tables
- Keep dance floor slightly brighter
- Light entry path softly
Pro tip: Dim lights during dinner.
Why it works: Soft glow creates intimacy.
9. Schedule Vendor Decor Timeline


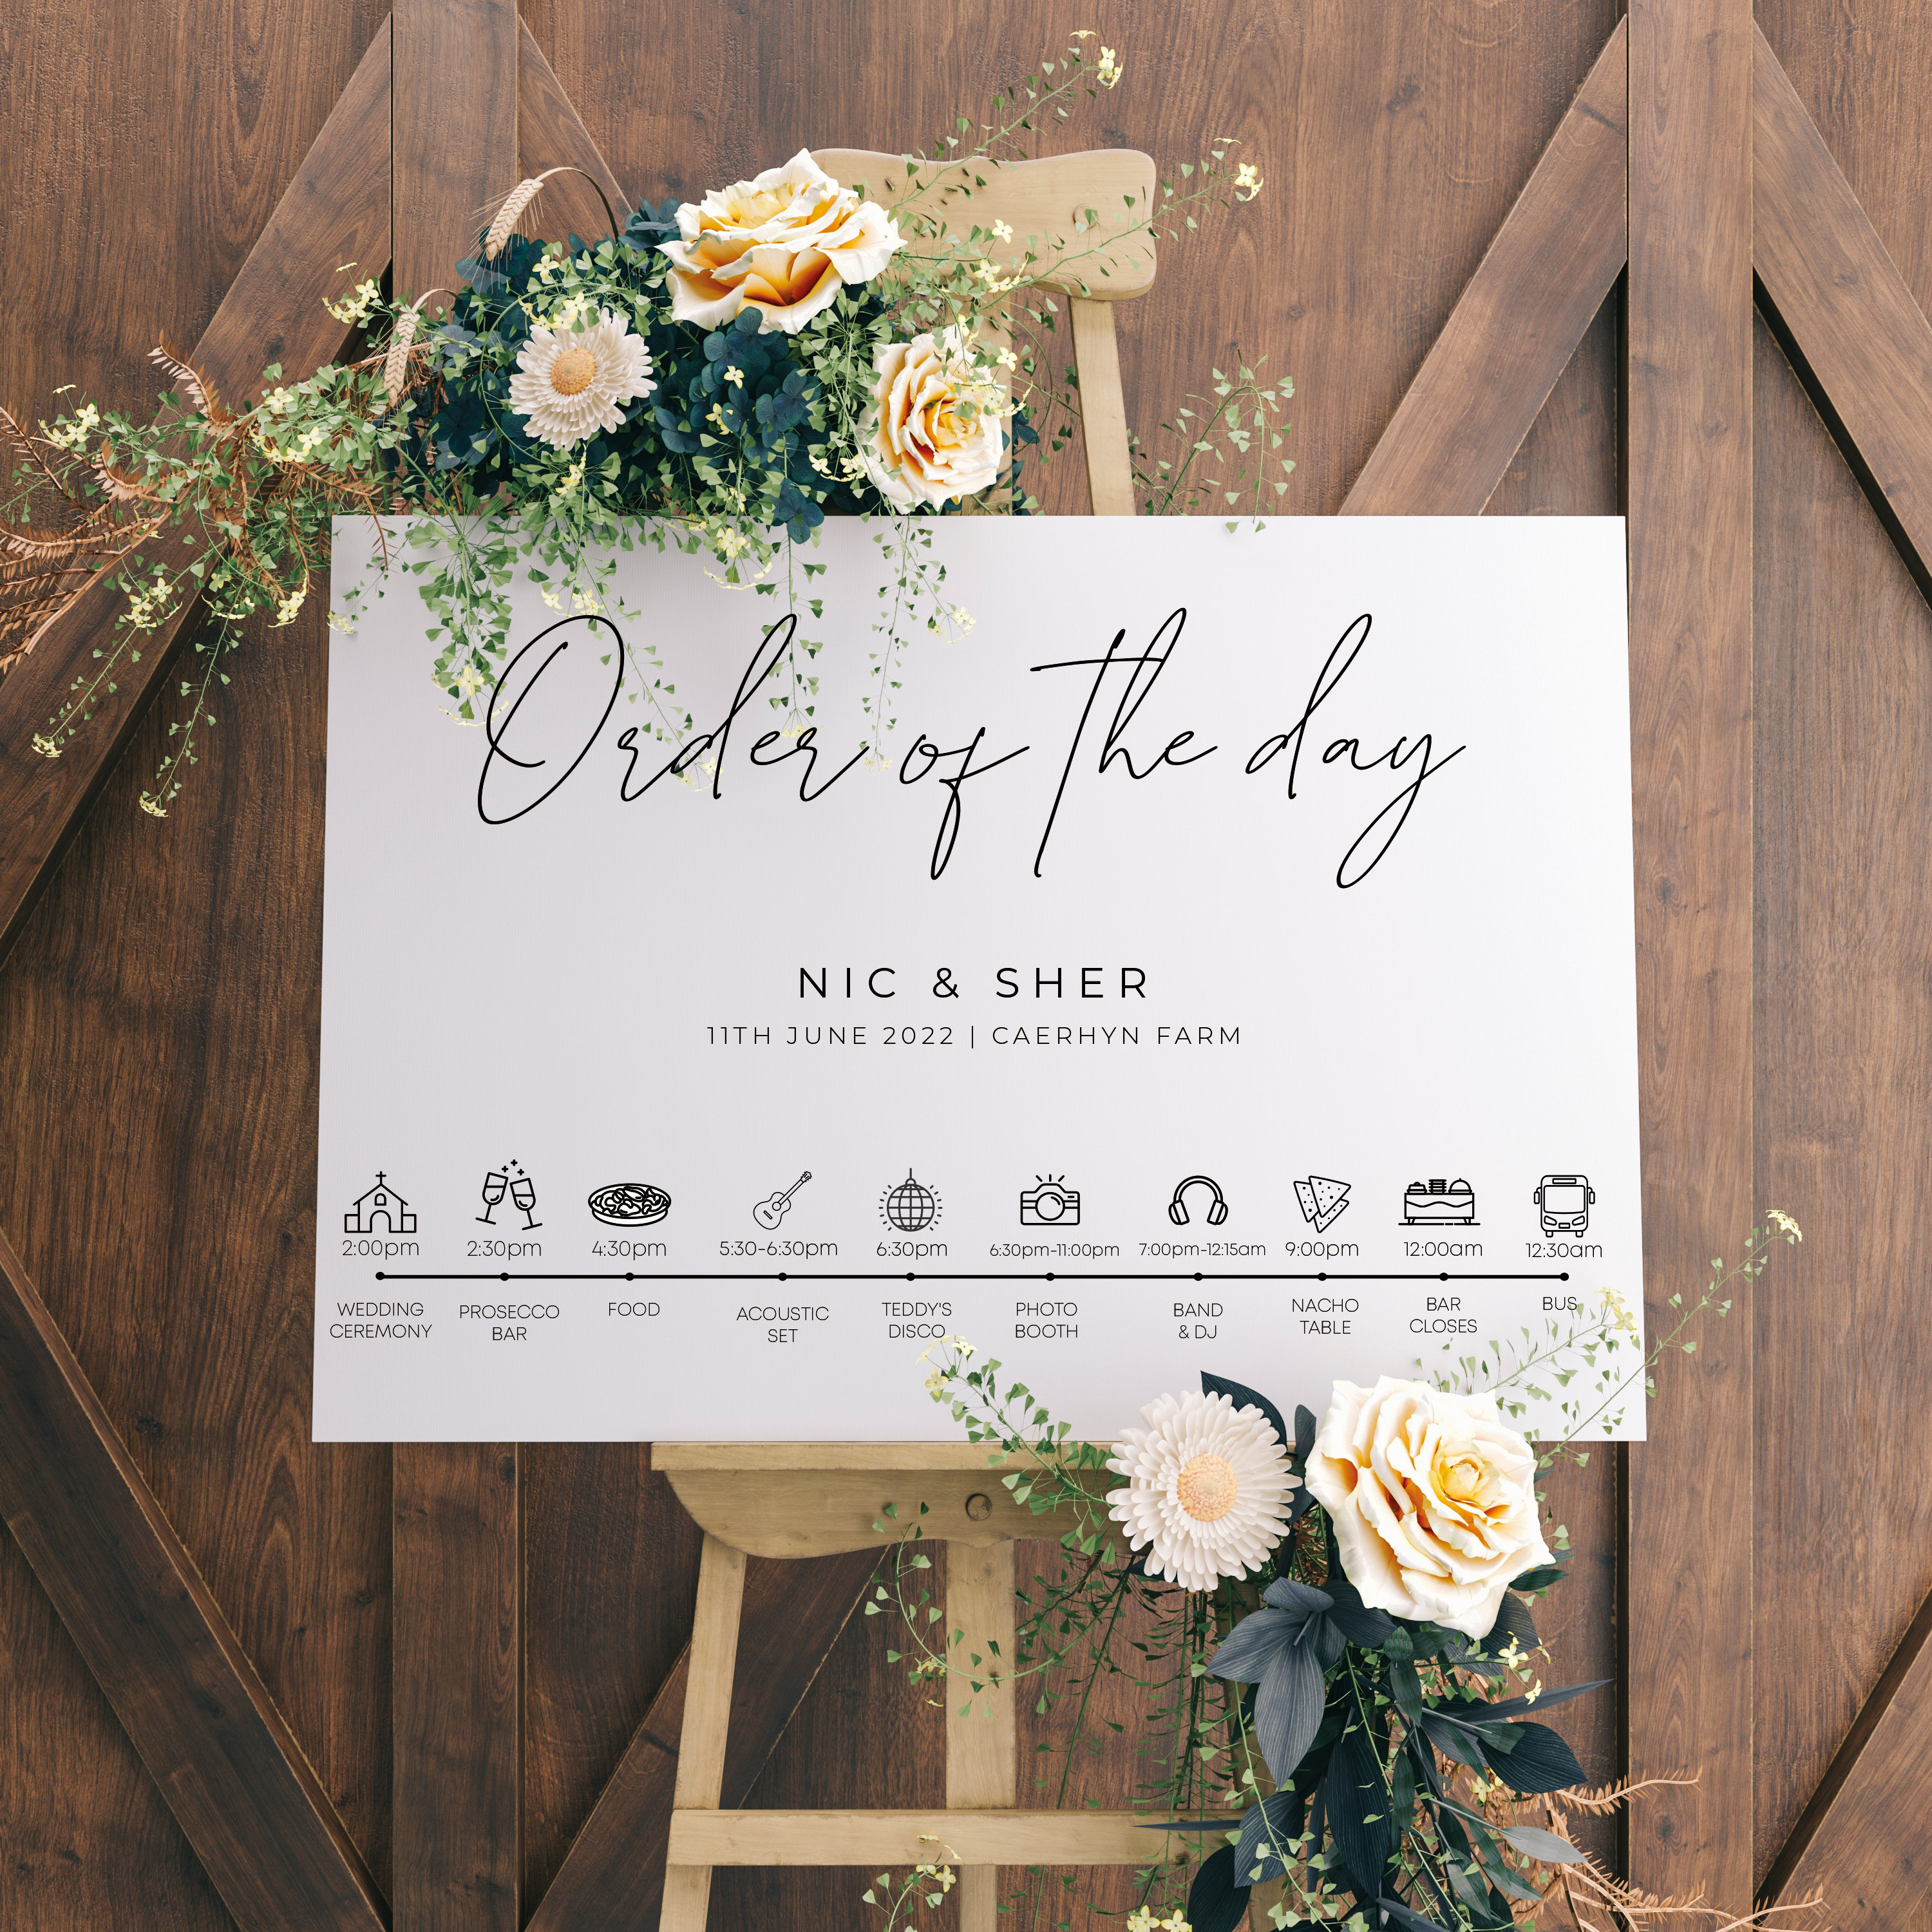
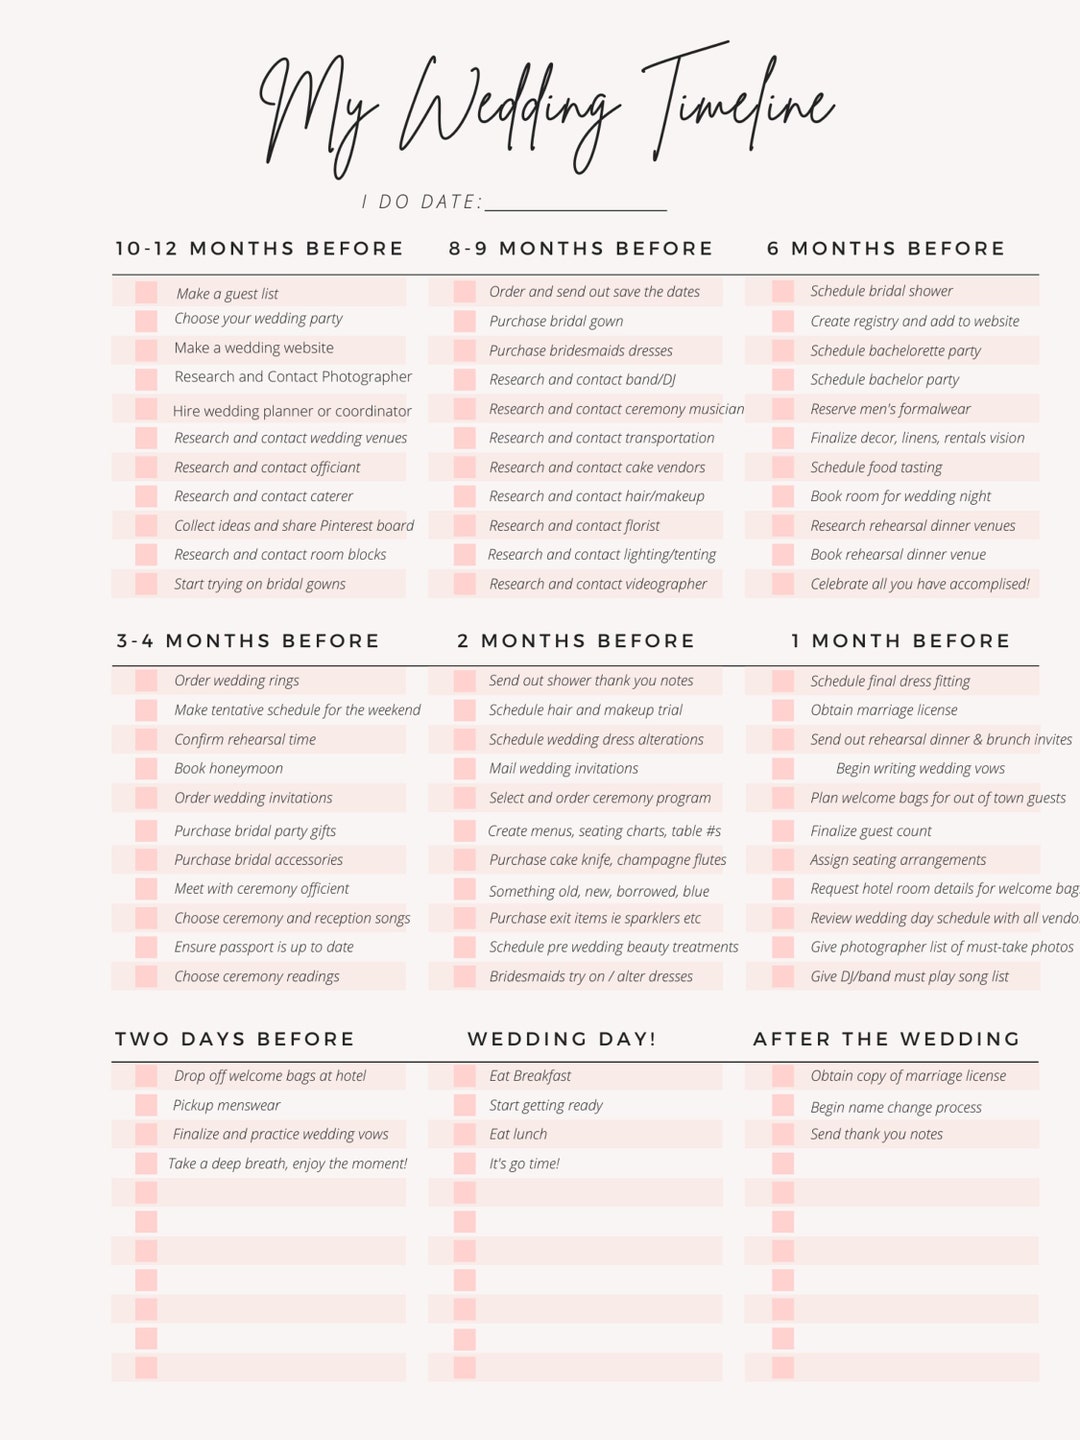
Decor vendors need clear timelines. Florist. Rental team. Lighting crew. Share setup access times and venue rules.
Midway through planning, check your full wedding planning checklist to align everything.
- Confirm load-in time
- Share venue map
- Send final design mockups
- Set payment deadlines
- Confirm breakdown time
Pro tip: Create one shared group chat for updates.
Why it works: Fewer miscommunications happen.
10. Organize Setup Day Timeline
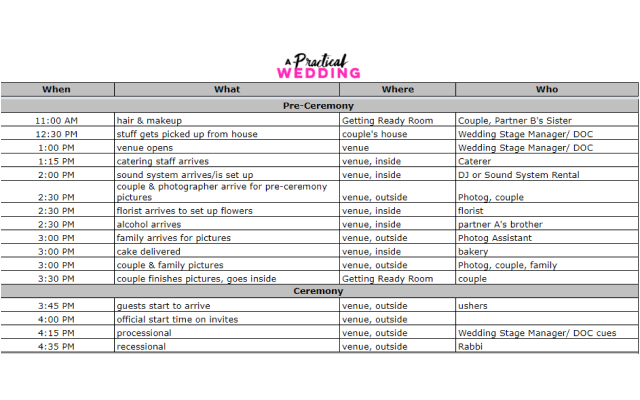

Setup day moves fast. Break the day into hourly blocks. Florals first. Large rentals next. Small decor last.
Keep someone in charge of checking progress. Not you.
- Assign a decor coordinator
- Print vendor contact list
- Keep checklist printed
- Schedule final reveal time
- Leave 1-hour buffer
Pro tip: Don’t DIY large installs on wedding morning.
Why it works: You stay relaxed and photo-ready.
11. Track Rental Inventory Items


Rentals include chairs, tables, linens, arches, and lighting stands. Count everything carefully.
Track pickup and return. Missing items cost extra.
- Make rental spreadsheet
- Count items on delivery
- Take photos of condition
- Assign return manager
- Store small items in labeled bins
Pro tip: Label boxes by zone.
Why it works: Setup becomes smoother and faster.
12. Divide Venue Styling Zones


Break decor into micro zones. Entrance. Welcome sign. Guest book table. Dessert table. Lounge area. Each area needs small attention.
This stops you from overdecorating one area and ignoring others.
- Style entrance for first impression
- Decorate cake table lightly
- Add small florals to bar
- Create cozy lounge corner
- Keep signage consistent
Pro tip: Take photos of each styled zone.
Why it works: You check balance visually.
13. Prepare Weather Backup Decor


Outdoor weddings need backup plans. Rain. Wind. Heat. Protect paper signs and lightweight decor.
Have a tent plan ready. Confirm power source for lighting.
- Use weighted bases
- Laminate important signs
- Secure candles in holders
- Prepare indoor shift layout
- Store extra linens
Pro tip: Keep clear umbrellas for photos.
Why it works: Weather won’t ruin your look.
14. Conduct Final Decor Walkthrough


Do a final walkthrough before guests arrive. Stand at entry. Sit at a guest table. Look at altar from back row.
Fix small issues early.
- Straighten linens
- Adjust candles
- Remove extra boxes
- Check symmetry
- Test lighting levels
Pro tip: Record short video for reference.
Why it works: You catch small visual gaps.
15. Easy Errors to Avoid
- Mixing too many color tones
- Blocking guest view with tall decor
- Forgetting lighting budget
- Overcrowding tables
- Skipping weather backup
- Not confirming vendor access time
FAQs
How do you plan wedding decor step by step?
Start with color mood board. Define theme. Sketch layout. Set budget. Plan focal points. Then organize vendors and timeline.
When should decor planning start?
Start 8–10 months before wedding. Large installs need early booking.
What decor items are essential first?
Venue backdrop, ceremony focal piece, table linens, lighting, and centerpieces.
How to organize decor vendors?
Share one timeline. Confirm access times. Keep written agreements. Use shared checklist.
Printable decor checklist tips?
Print by category. Use tick boxes. Keep one copy with planner and one with you.
Conclusion
Wedding decor feels overwhelming at first. But when you divide it into small zones and simple steps, it becomes clear.
Follow this guide slowly. Use your checklists. Align your theme. Trust your timeline.
For more inspiration and planning tools, explore our full wedding decor resources here: wedding decor.