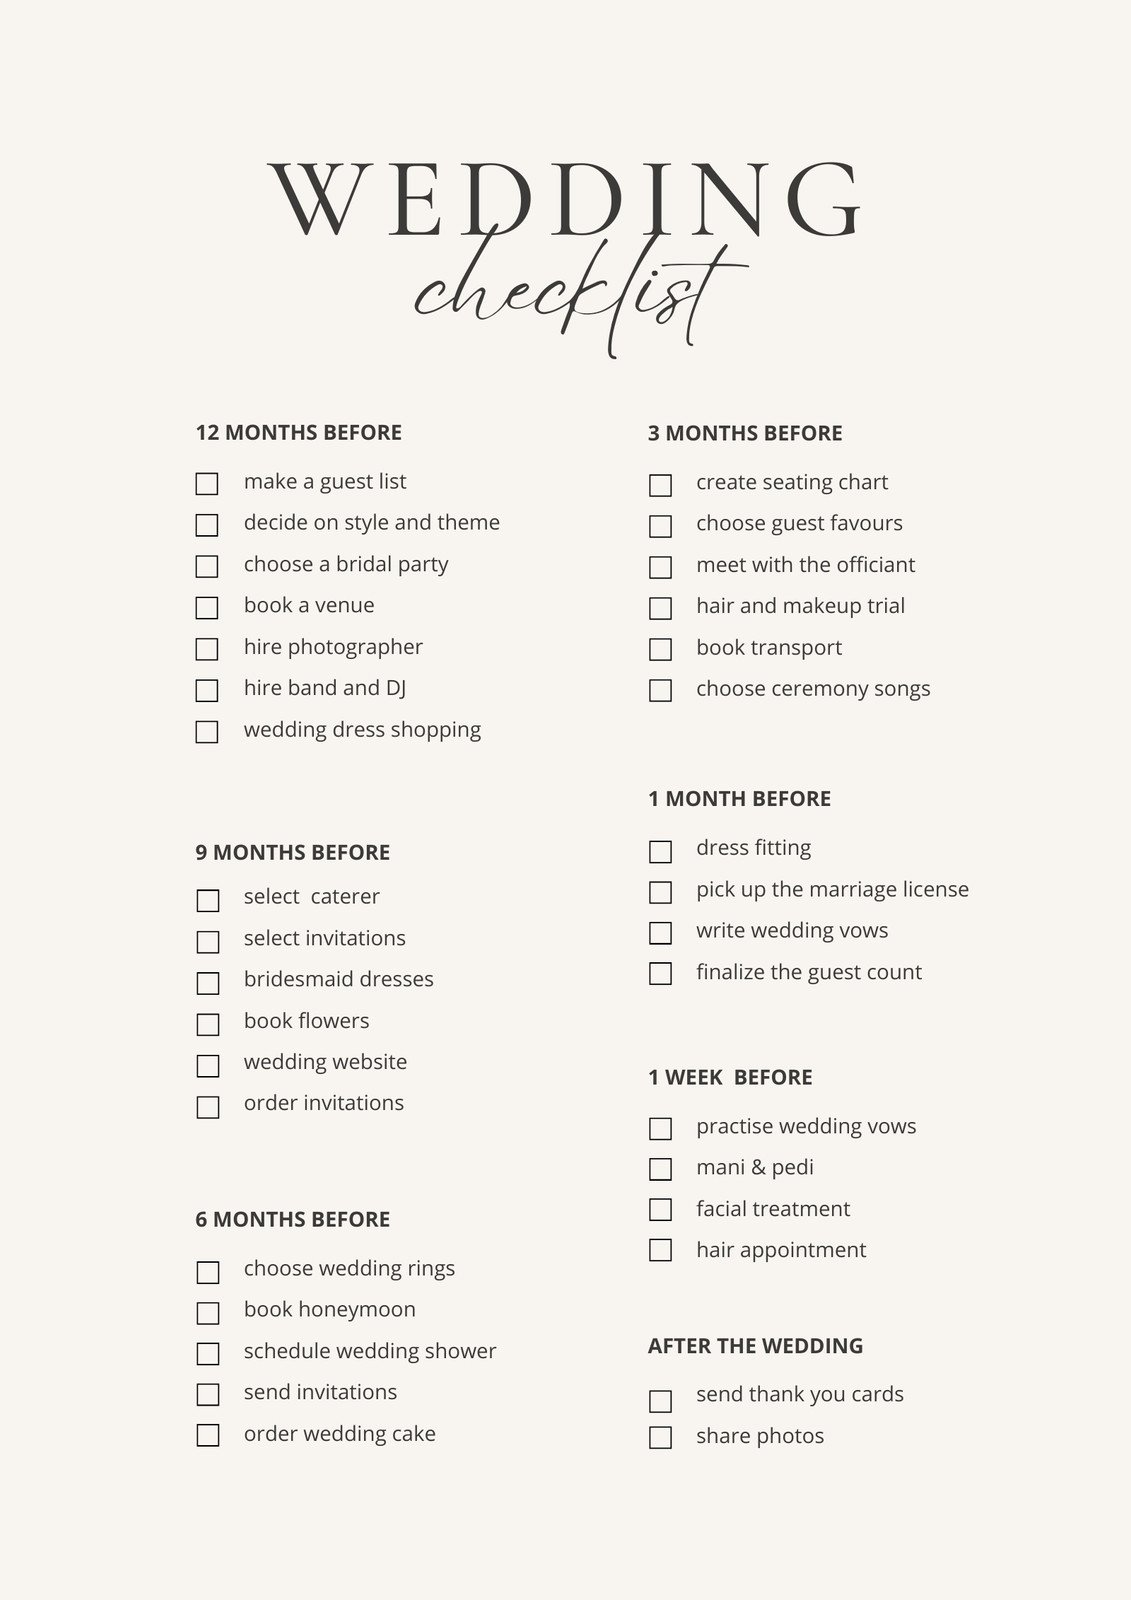
Wedding Checklist Printable
Planning a wedding feels exciting. Then the details hit. Dates. Vendors. Guest lists. Budget. It’s a lot. A wedding checklist printable keeps everything calm and clear. You see what’s done. You see what’s next. No guessing. No panic.
This guide shows you how to download, print, organize, and actually use your planner pages. Simple steps. Real results. Let’s make planning feel easy.
1. Download Printable Planner Sheets


Start by choosing clean, easy-to-read planner sheets. Look for timeline pages, vendor lists, and budget trackers. Avoid cluttered designs. White space helps your brain breathe. Download both PDF and editable versions if possible. Save them in one main wedding folder on your laptop and phone so you never lose them.
- Search trusted design sites like Etsy or Canva
- Download full bundles, not random pages
- Check if files are A4 and US Letter friendly
- Save backups in cloud storage
- Rename files clearly (ex: “Guest_List_v1”)
Pro tip: Create a master digital folder before downloading anything.
Why it works: You avoid messy files and wasted time later.
2. Print Binder Ready Pages


Printing matters more than people think. Use thick paper so ink doesn’t bleed. Print double-sided to save space. Keep margins wide if you plan to hole punch. A simple white binder looks timeless and neat.
- Use 100–120gsm paper
- Print in black and white for ink savings
- Test one page before bulk printing
- Leave extra edge space for punching
- Add page numbers at the bottom
Pro tip: Print a test copy first.
Why it works: You catch spacing issues before wasting paper.
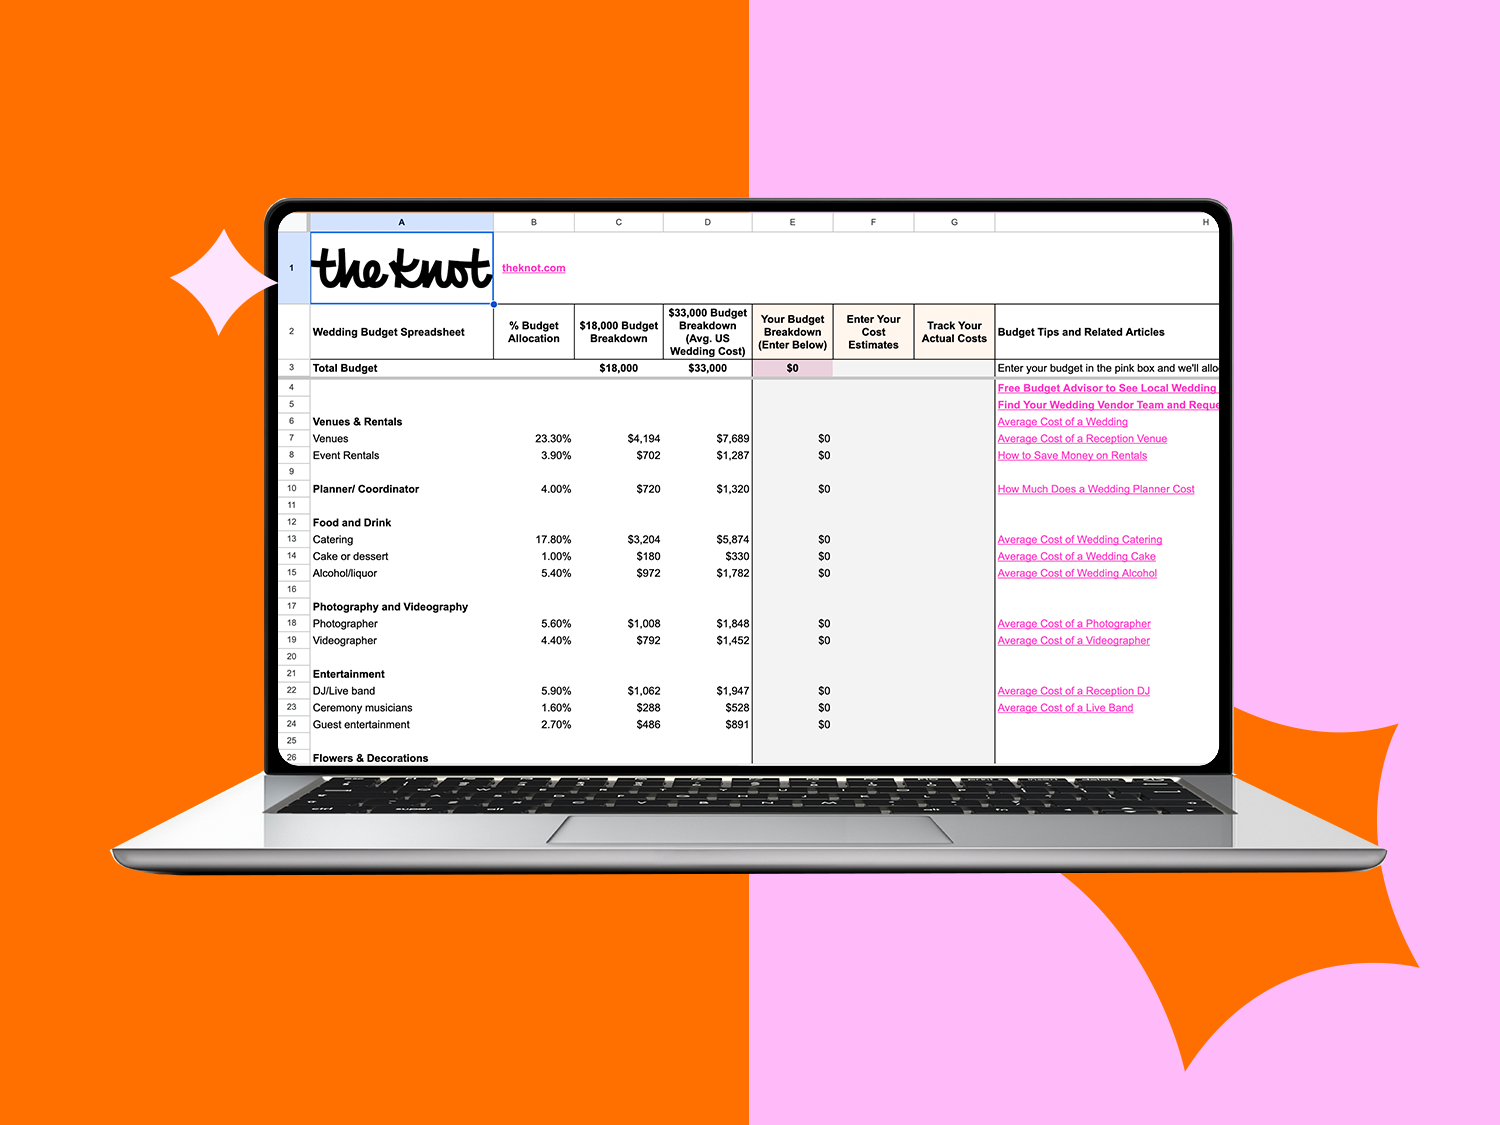
3. Fill Budget Tracking Tables

![]()

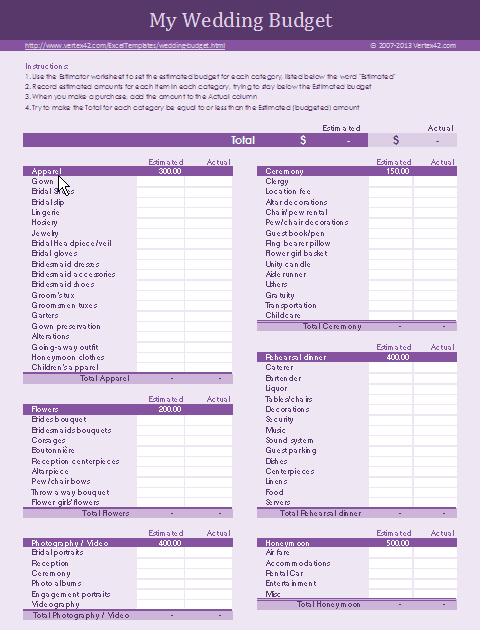
Your budget page is your safety net. Write down your total budget first. Then split it into categories: venue, dress, decor, catering, photography. Be honest. Overestimate costs. Underestimate stress.
- Add estimated cost column
- Add actual paid column
- Track deposits and due dates
- Highlight paid items
- Review weekly
Pro tip: Leave 10% extra for surprise costs.
Why it works: Weddings always have small last-minute expenses.
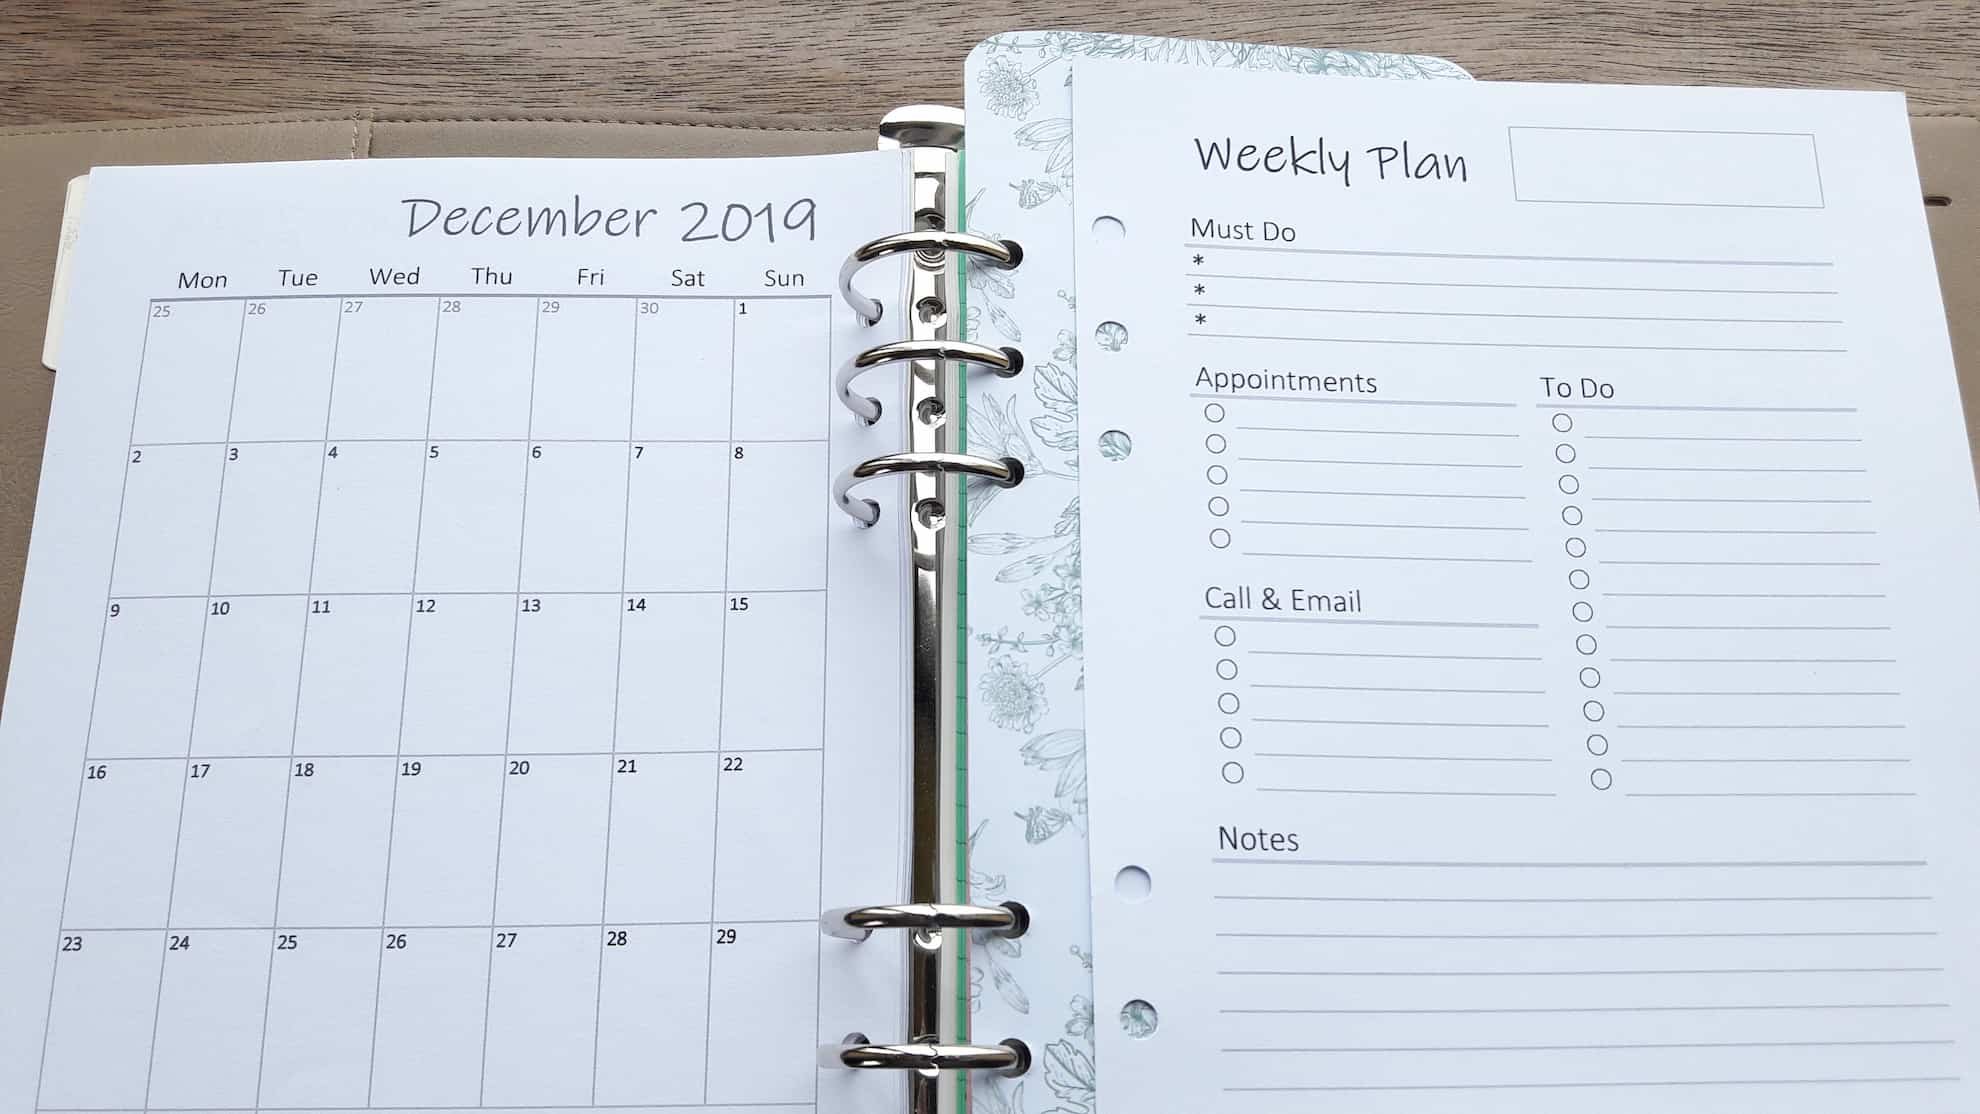
4. Organize Timeline Calendar Pages


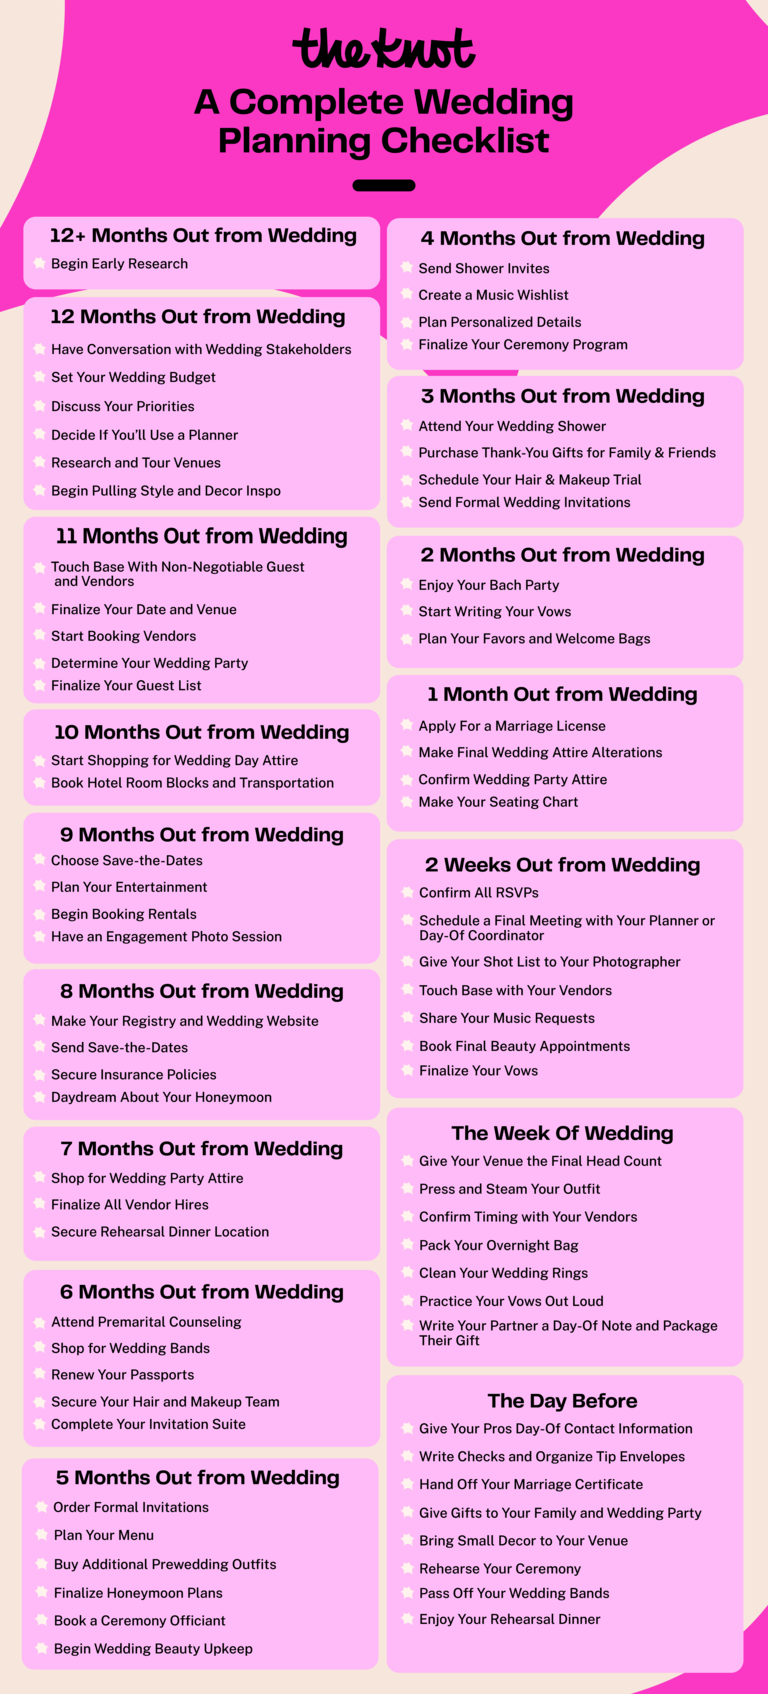
Timeline pages keep you ahead. Break planning into months. Then weeks. Mark deadlines like venue booking, dress fittings, and invitation sending. If you’re unsure what to include, check this detailed planning checklist for guidance.
- Circle major booking deadlines
- Add payment due reminders
- Block dress fitting days
- Set reminder alerts on phone
- Review every Sunday night
Pro tip: Plan backward from your wedding date.
Why it works: You never miss key booking windows.
5. Add Editable Planning Spreadsheets


Sometimes paper isn’t enough. Editable sheets let you sort guests, filter vendors, and update costs fast. Tools like Google Sheets or Excel work great. If you prefer templates, explore a ready-made wedding spreadsheet for faster setup.
- Use separate tabs for each category
- Share with your partner
- Add formulas for auto totals
- Color code priority vendors
- Keep cloud backup
Pro tip: Sync your spreadsheet to your phone.
Why it works: You can update details anytime.
6. Check Packing List Sections


Wedding week gets busy. A packing checklist keeps calm in chaos. Write down decor items, rings, vows, shoes, and emergency kit items. Cross things off only after they’re inside labeled boxes.
- List ceremony and reception items separately
- Add beauty emergency kit
- Include vendor payments envelope
- Pack vow copies
- Assign someone to carry key items
Pro tip: Pack three days early.
Why it works: You avoid last-night stress.
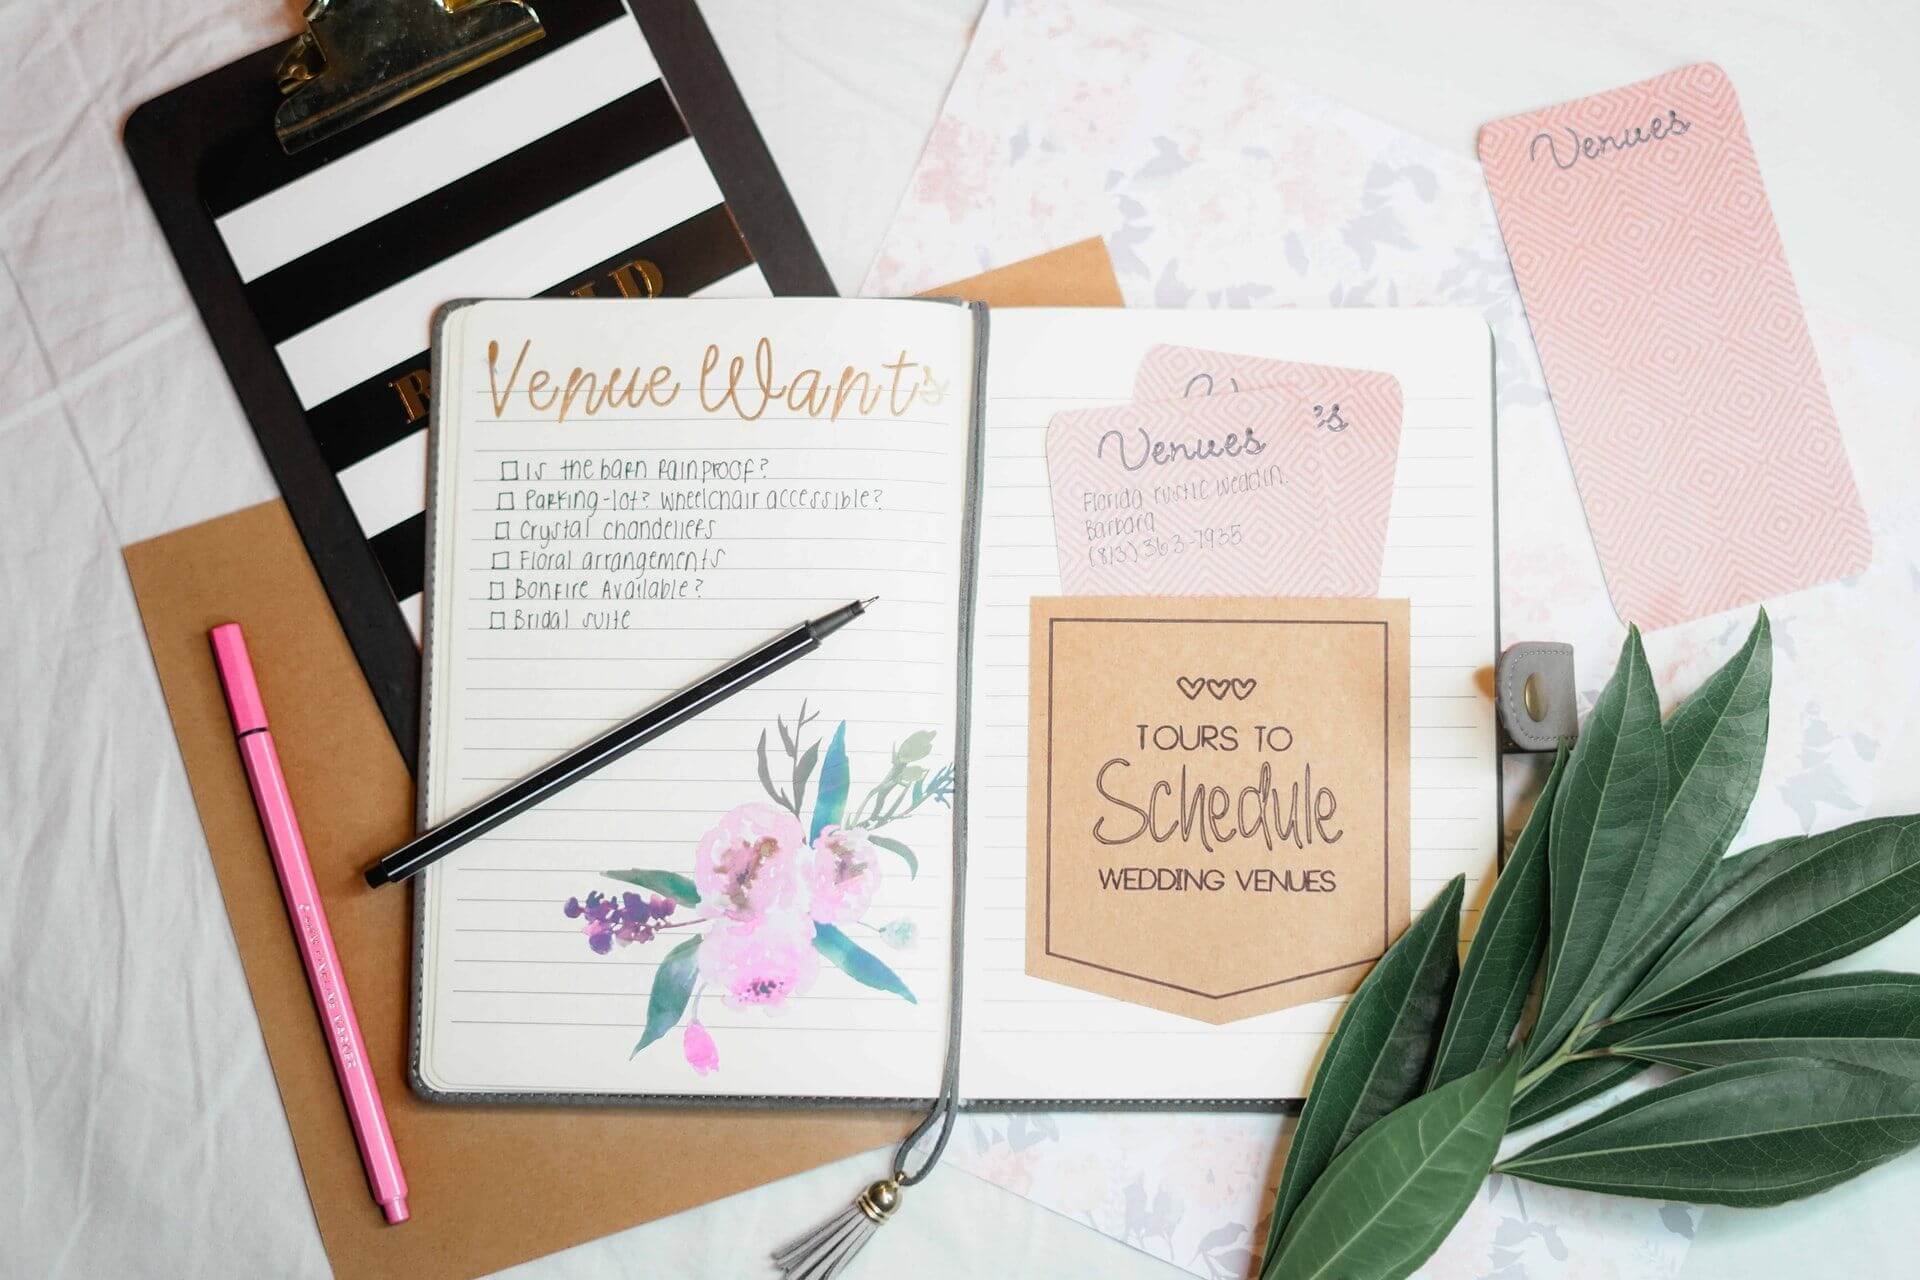
7. Label Checklist Divider Tabs
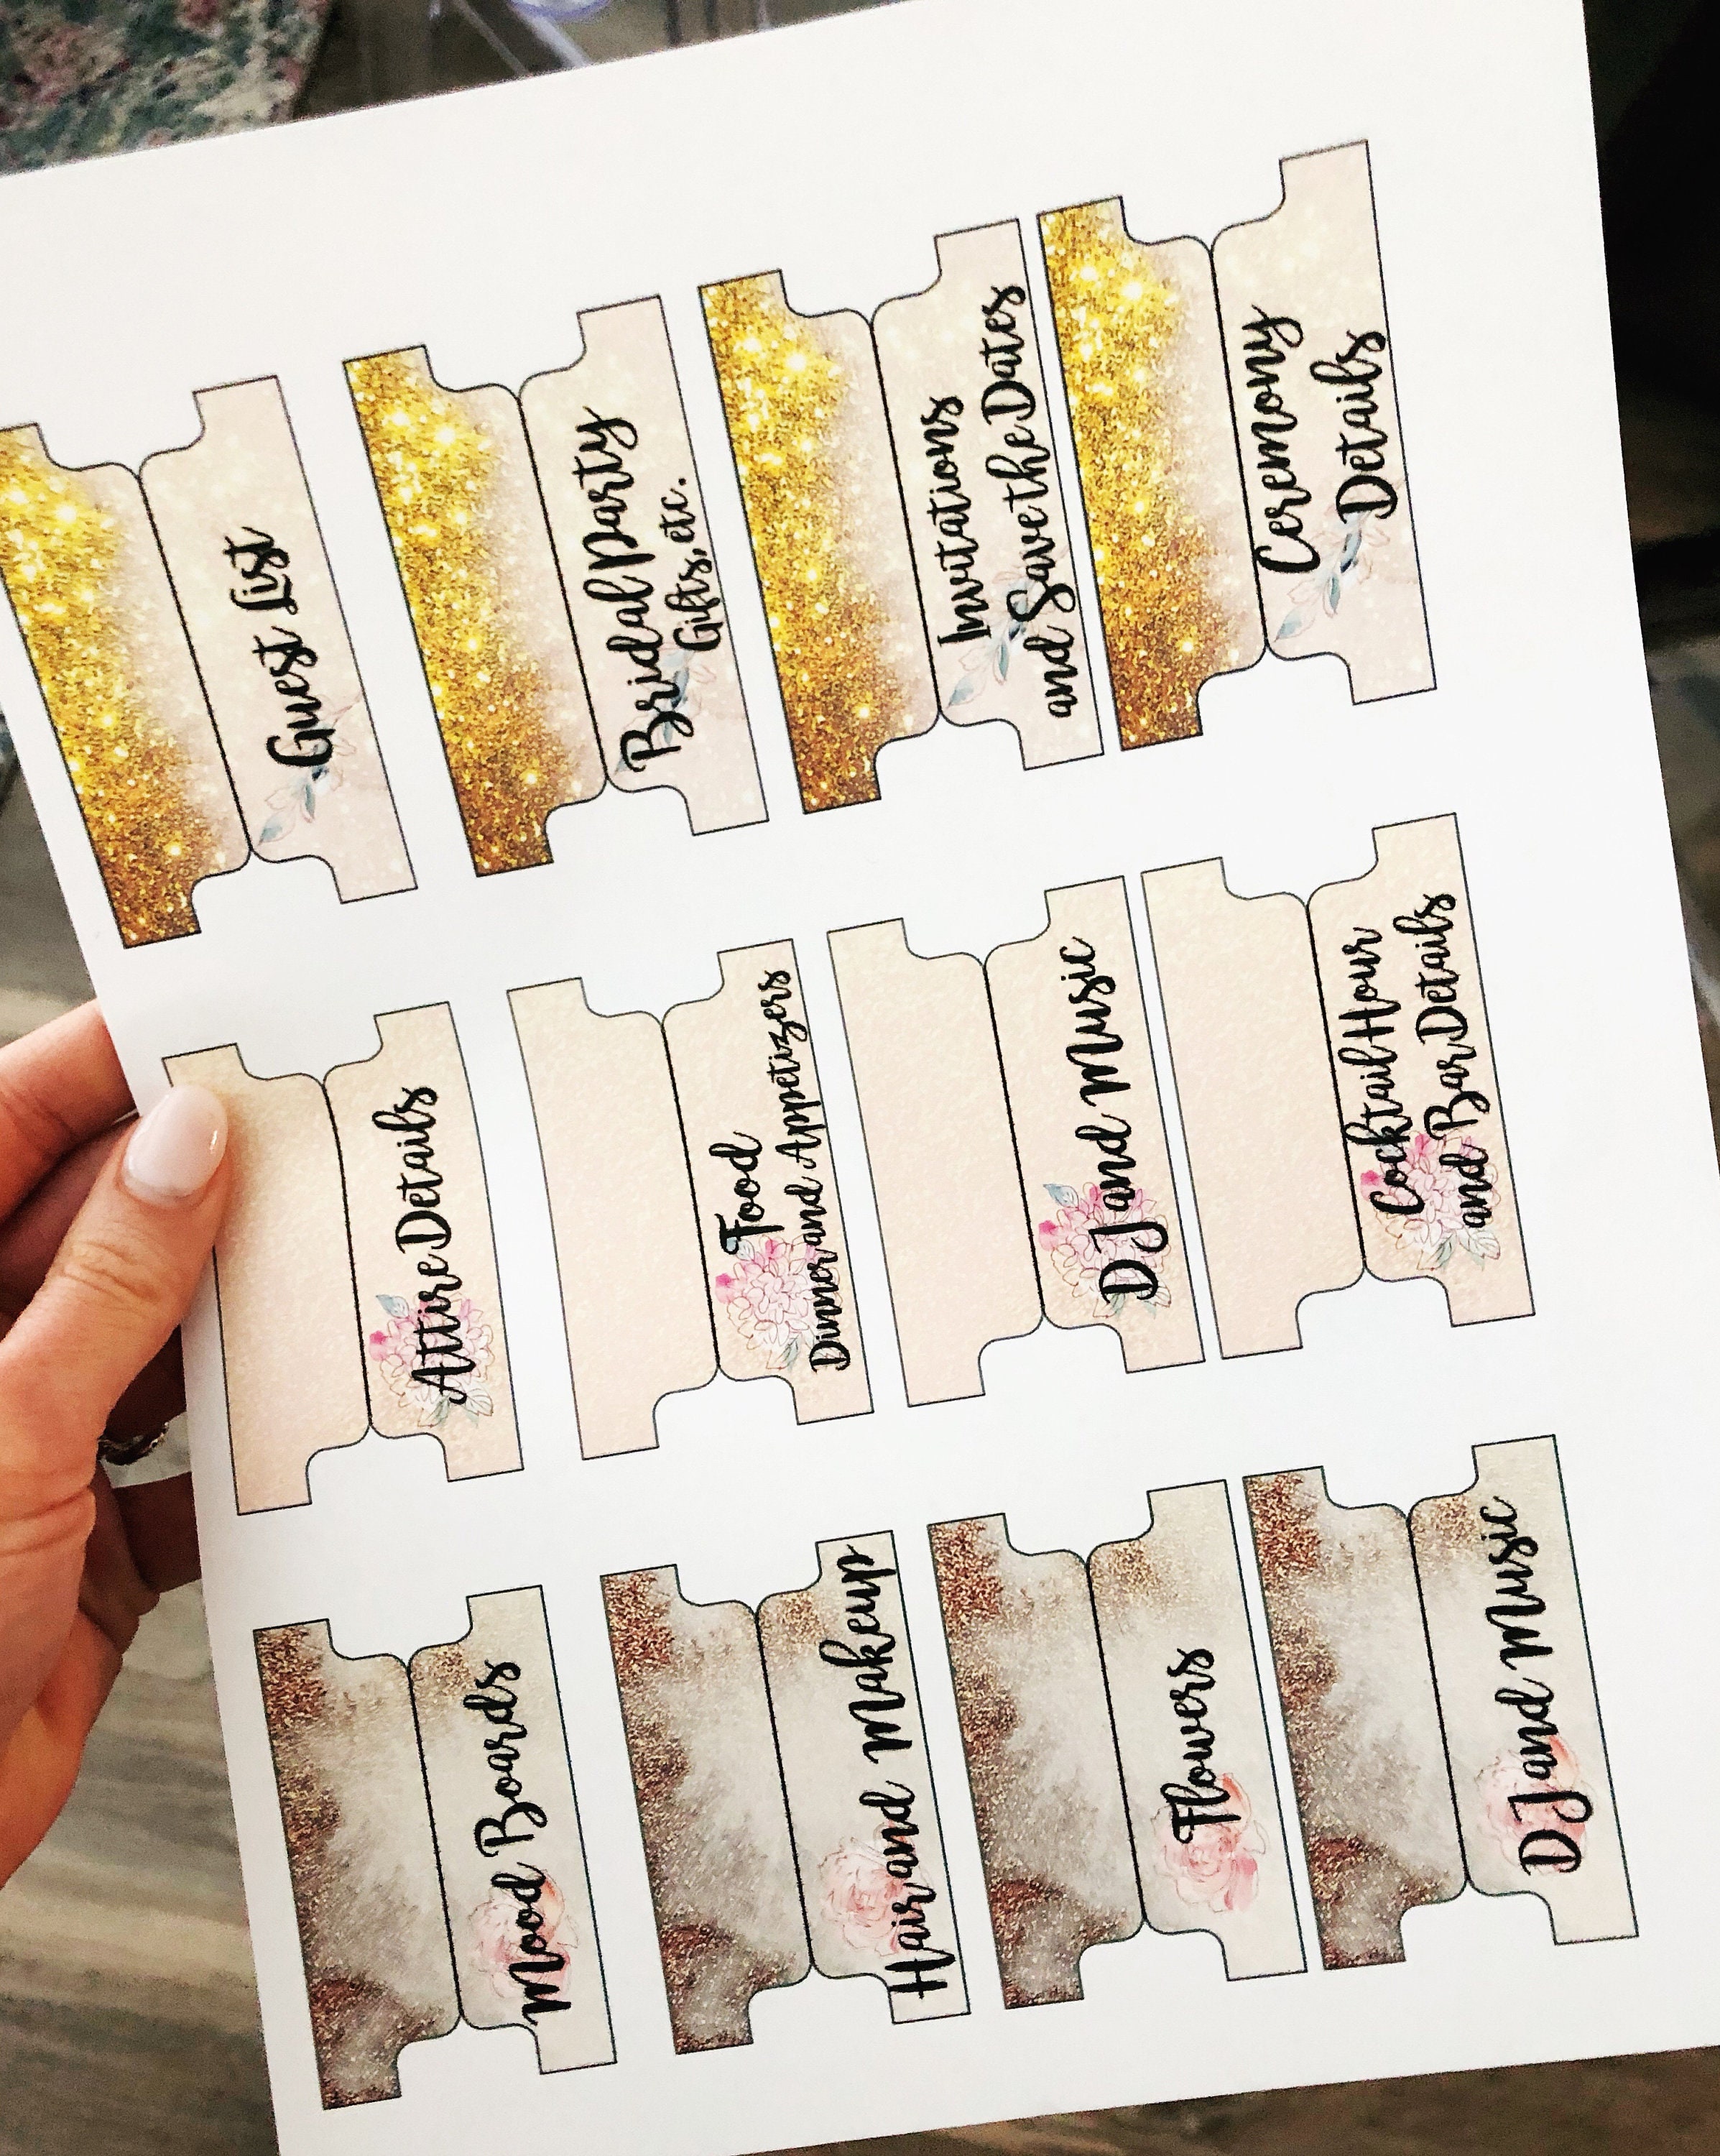


Dividers make your binder easy to flip through. Label sections like Budget, Guests, Vendors, Decor, Timeline. Use simple fonts. Avoid too many colors.
- Print matching tab labels
- Use clear plastic divider sheets
- Keep most-used sections front
- Add sticky notes for quick tasks
- Update tabs as plans change
Pro tip: Use neutral tones.
Why it works: Clean visuals reduce mental clutter.
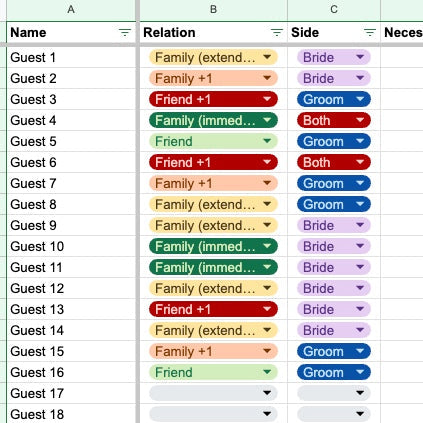
8. Arrange Seating Chart Pages


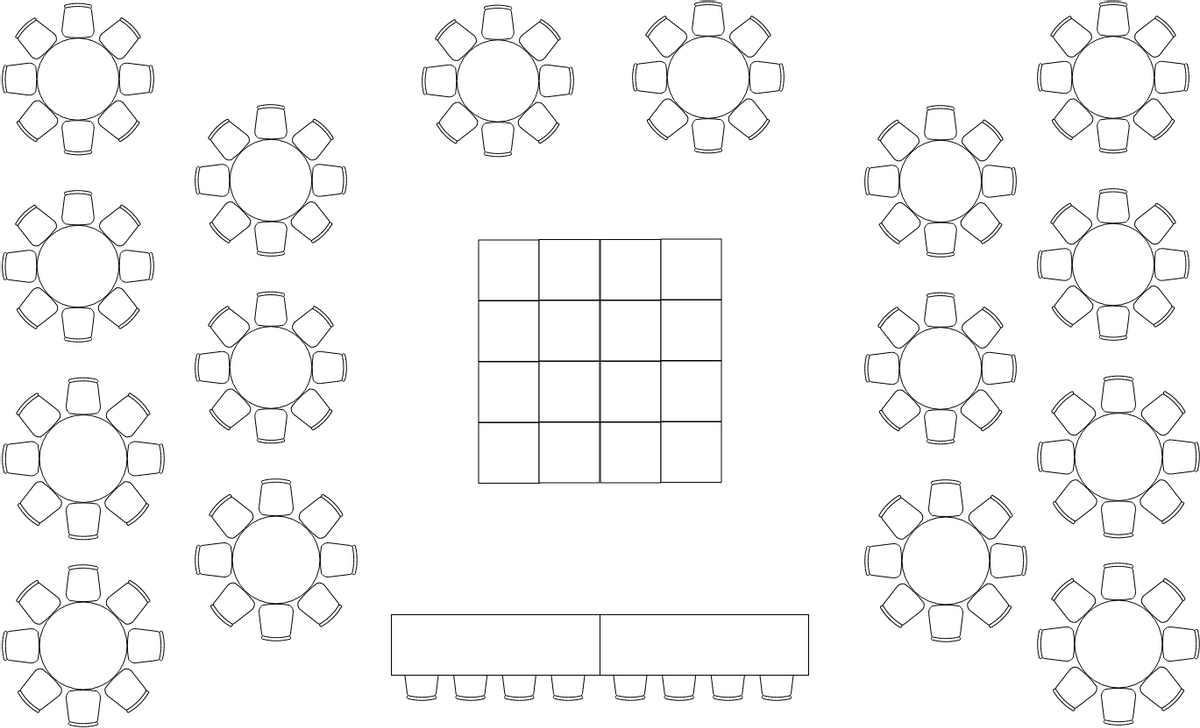
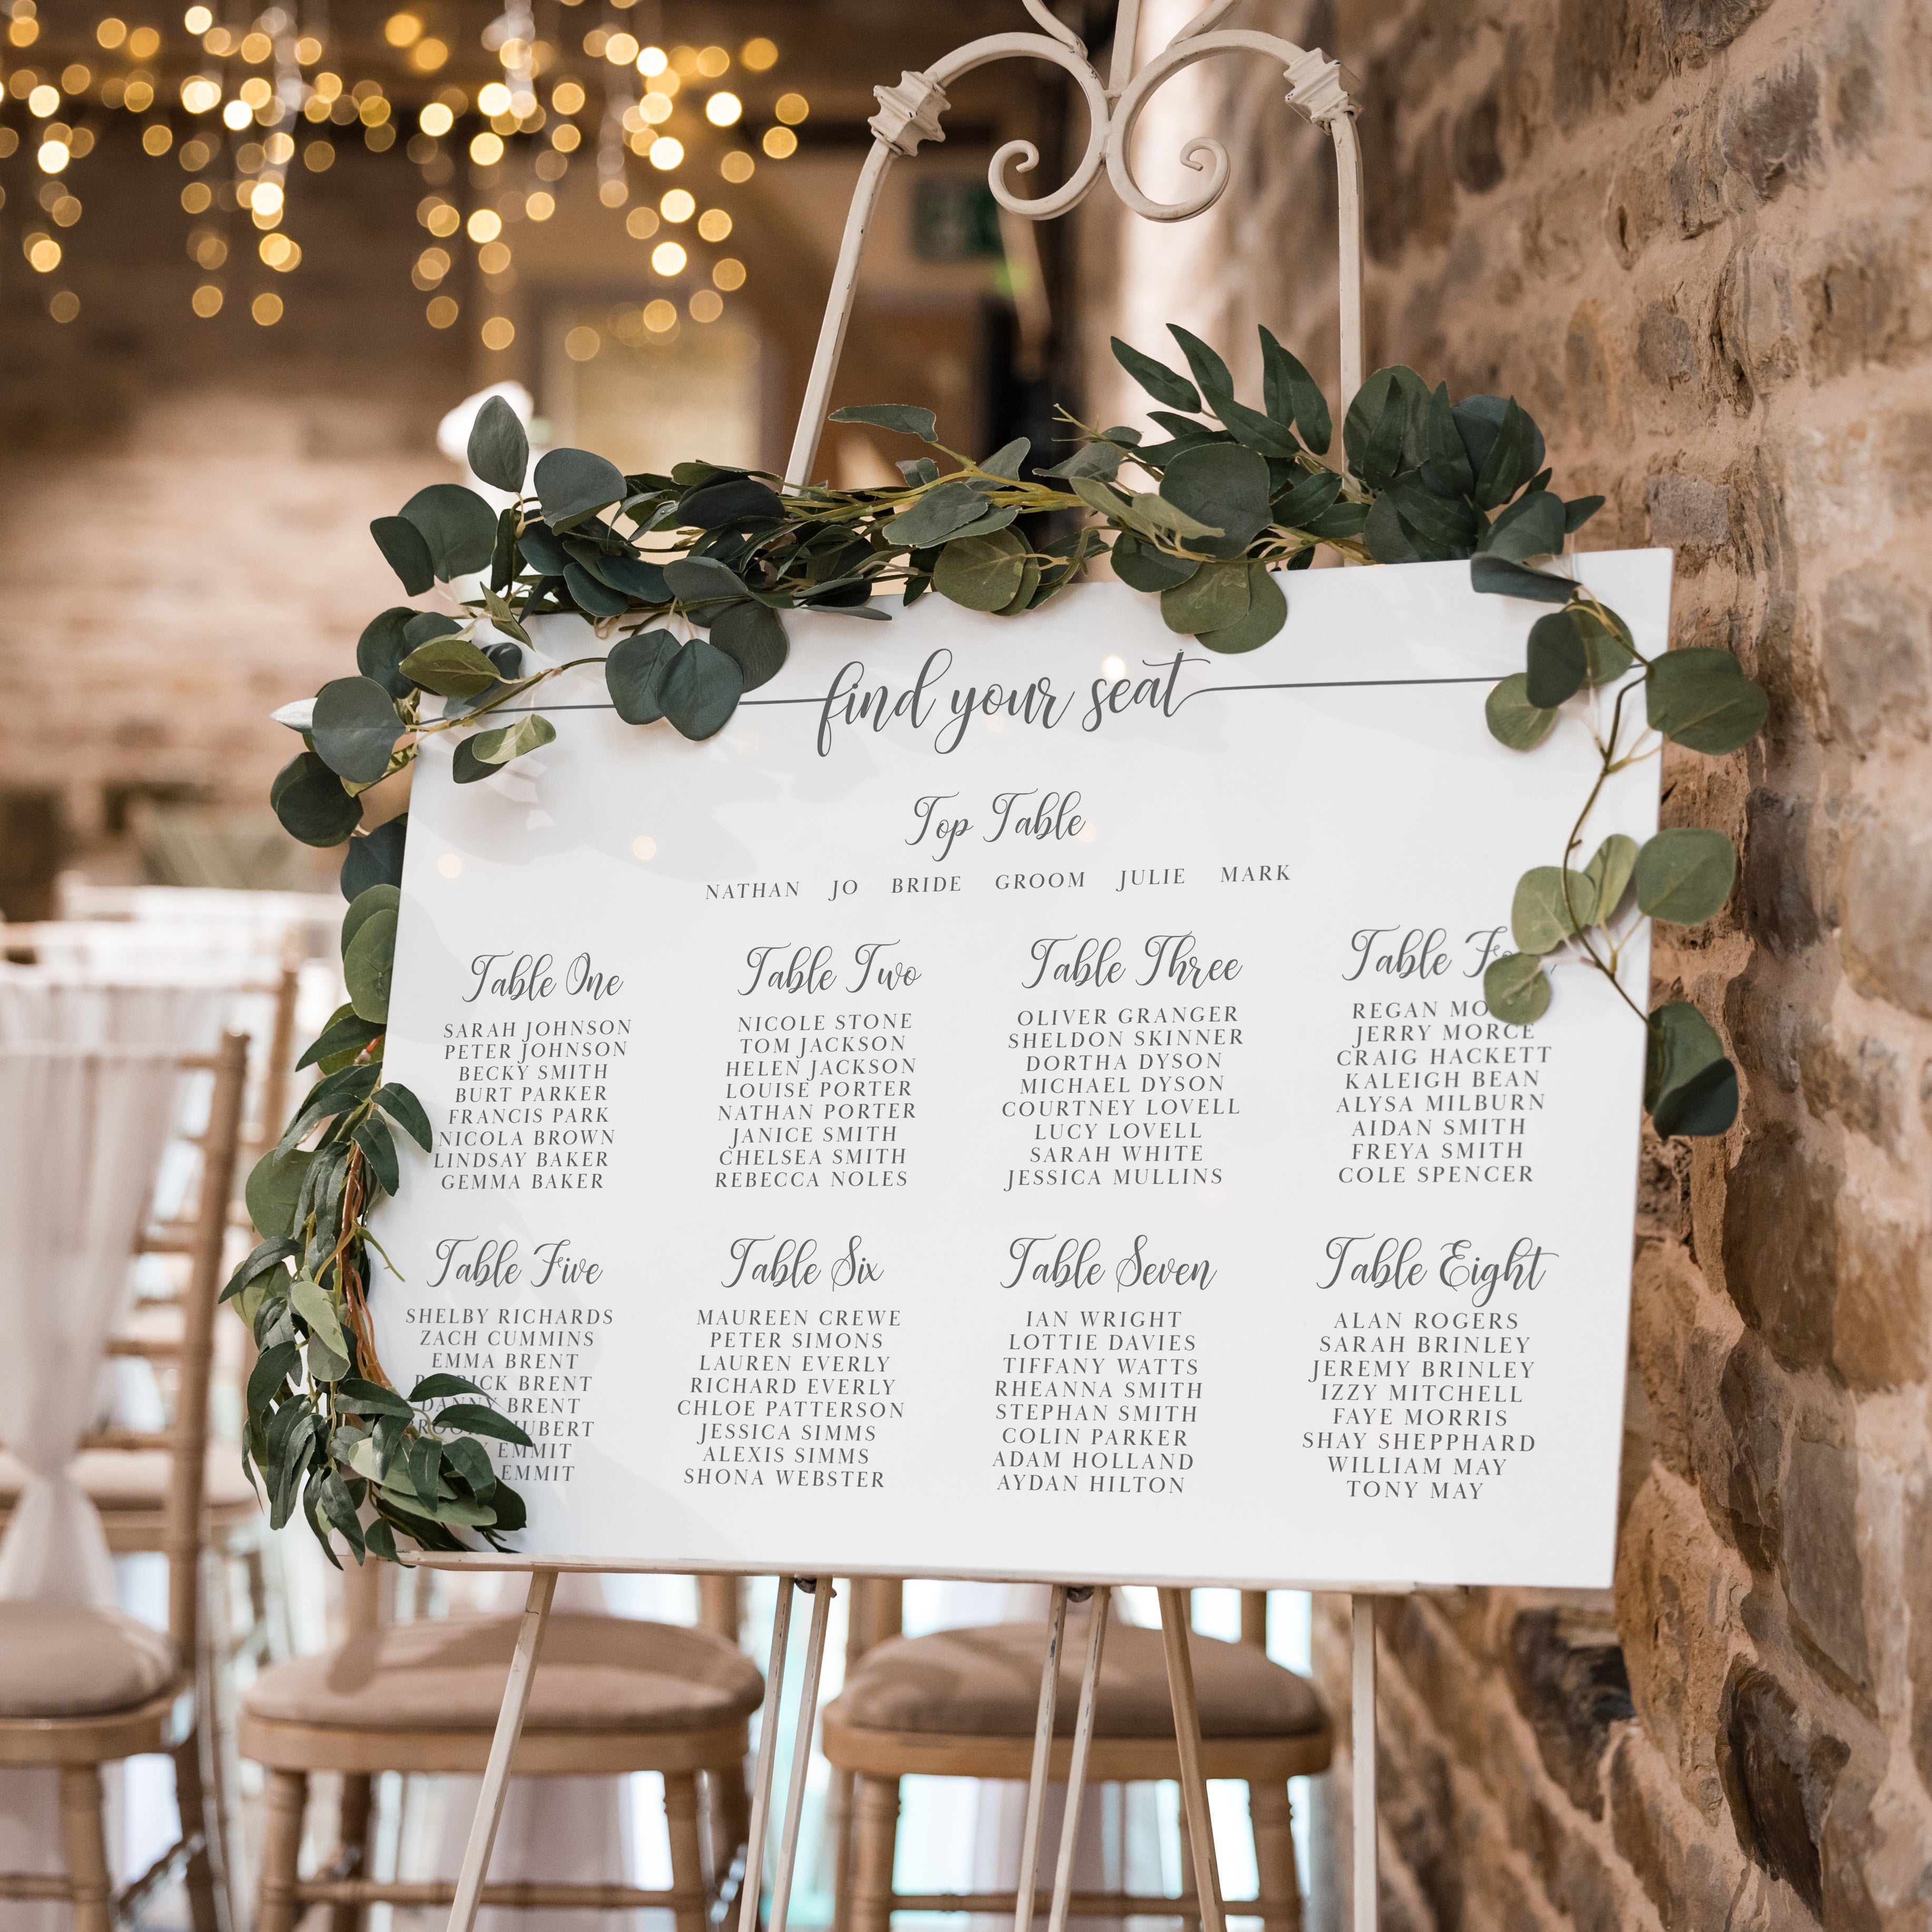
Seating charts need patience. Start with family. Then wedding party. Then guests by friend groups. Keep drama away from each other. Print rough drafts before finalizing.
- Use pencil first
- Mark plus-ones clearly
- Keep elderly guests near exits
- Balance table sizes
- Print final version for venue
Pro tip: Ask parents to review early.
Why it works: It prevents last-minute changes.
9. Save Vendor Contact Sheets
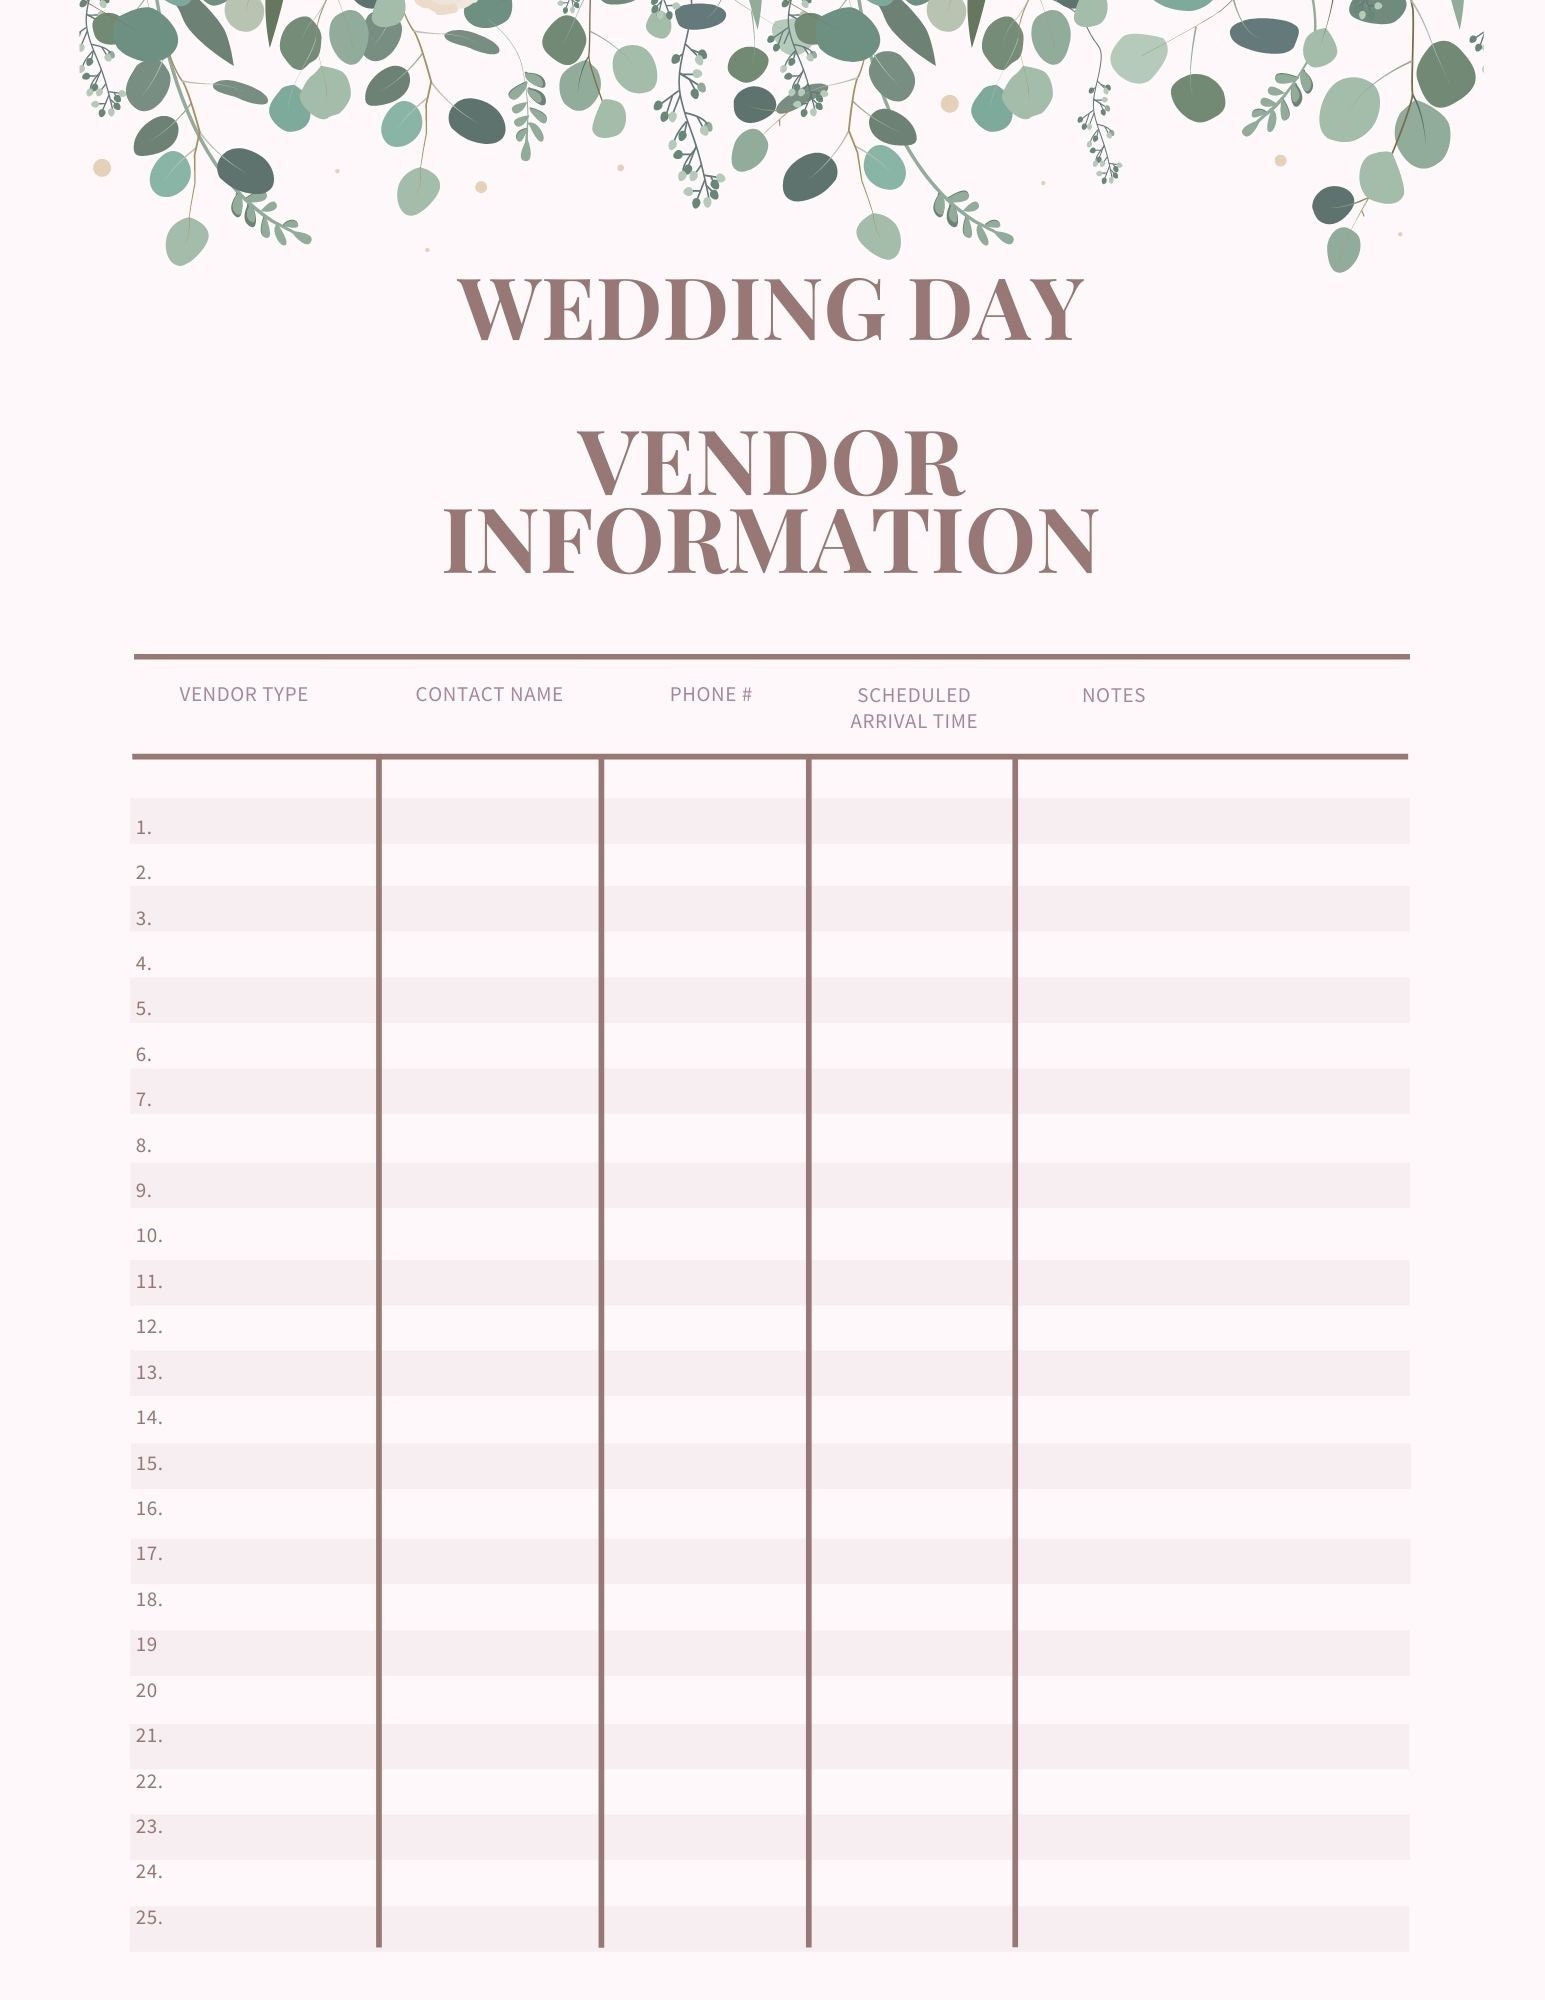

![]()
Keep every vendor’s phone, email, and payment date in one place. On wedding day, give a copy to your maid of honor or planner.
- List contact name and backup number
- Note contract signed date
- Write arrival times
- Highlight unpaid balances
- Store digital copy too
Pro tip: Screenshot key numbers on your phone.
Why it works: Quick access saves panic moments.
10. Pack Labeled Wedding Boxes

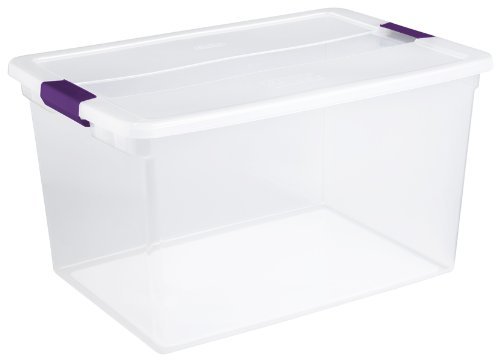
Use clear bins or labeled boxes. One for decor. One for ceremony. One for reception. Tape a checklist on top of each box.
- Label each side clearly
- Color code with stickers
- Add item checklist outside
- Assign delivery person
- Keep fragile items wrapped
Pro tip: Take photos of box contents.
Why it works: You remember what goes where.
11. Highlight Priority Task Items


Not all tasks are equal. Some matter more. Highlight big bookings like venue and catering. Circle deadlines. Use symbols for urgent tasks.
- Star urgent bookings
- Highlight vendor payments
- Mark legal paperwork
- Track RSVP deadlines
- Review weekly
Pro tip: Use one highlight color only.
Why it works: Too many colors confuse focus.
12. Prepare Decor Inventory List


Decor items get lost easily. Write every piece down. Candles. Table numbers. Arches. Signage. If you need help building it, check this helpful wedding decor checklist for full coverage.
- Count quantities
- Mark rented vs owned
- Note pickup and return times
- Assign setup helpers
- Pack by event section
Pro tip: Print two copies.
Why it works: One stays home. One goes to venue.
13. Review Final Checklist Pages


One week before the wedding, review everything. Slowly. Check contracts. Confirm arrival times. Recheck guest count. Use trusted resources like The Knot, Brides.com, and Martha Stewart Weddings for final double-check inspiration.
- Call key vendors
- Confirm timeline
- Count final RSVPs
- Pack marriage license
- Rest the day before
Pro tip: Schedule a calm review evening.
Why it works: A clear mind catches small mistakes.
Small Planning Errors to Dodge
- Printing without margin space
- Forgetting backup digital copies
- Overcrowding your binder
- Ignoring budget updates
- Leaving packing until last day
FAQs
Where can I download a printable checklist?
You can download from design marketplaces like Etsy, Canva, or wedding blogs. Look for full bundles with timeline, budget, guest list, and decor pages included.
Best way to print planners?
Use thick paper and test print first. Print double-sided and use a simple binder.
PDF or spreadsheet better?
Use both. PDF works for physical planning. Spreadsheet helps with numbers and sorting guests.
Can I customize checklist templates?
Yes. Most templates allow editing in Canva or Google Sheets. Change colors, fonts, or categories to match your style.
Binder organization ideas?
Use labeled dividers. Keep budget and timeline in front. Add a pocket sleeve for loose papers.
Final Thoughts
A wedding checklist printable turns stress into structure. It keeps your ideas safe. It keeps your budget clear. Most of all, it gives you peace.
If you’re building your full planning system, explore more helpful guides under wedding planning to stay organized from day one.
Plan smart. Stay calm. Enjoy your moment.