Your wedding cake is not just dessert. It is a centerpiece. Guests gather around it. Cameras point toward it. Pinterest boards fill with it.
A 3 tier wedding cake feels timeless. It looks grand without being overwhelming. It serves a good number of guests. And when styled right, it becomes a soft focal point that ties your entire wedding look together.
If you want your cake to feel balanced, elegant, and photo-ready, this guide walks you through every detail — step by step.
1. Build Balanced Tier Stack


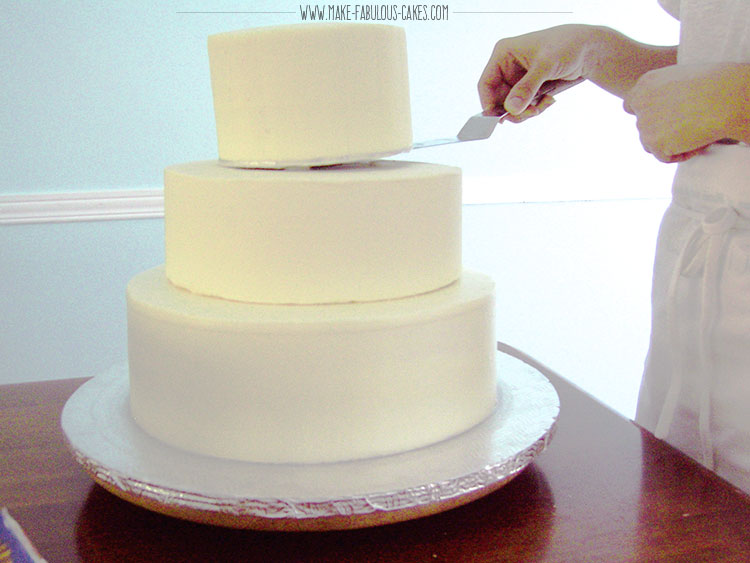

A beautiful 3 tier wedding cake starts with balance. Each layer should feel stable and centered. The bottom tier is the widest. The middle tier supports gently. The top tier crowns the design. When proportions feel right, the cake looks calm and refined, not heavy or awkward.
- Keep tier size progression gradual (12”–9”–6” works well).
- Avoid extreme size jumps between layers.
- Use a cake leveler before stacking.
- Chill layers before final assembly.
- Check alignment from all angles.
Extra guidance: Step back and look from guest eye level before final placement.
What makes this effective: Even stacking creates instant visual harmony in photos.
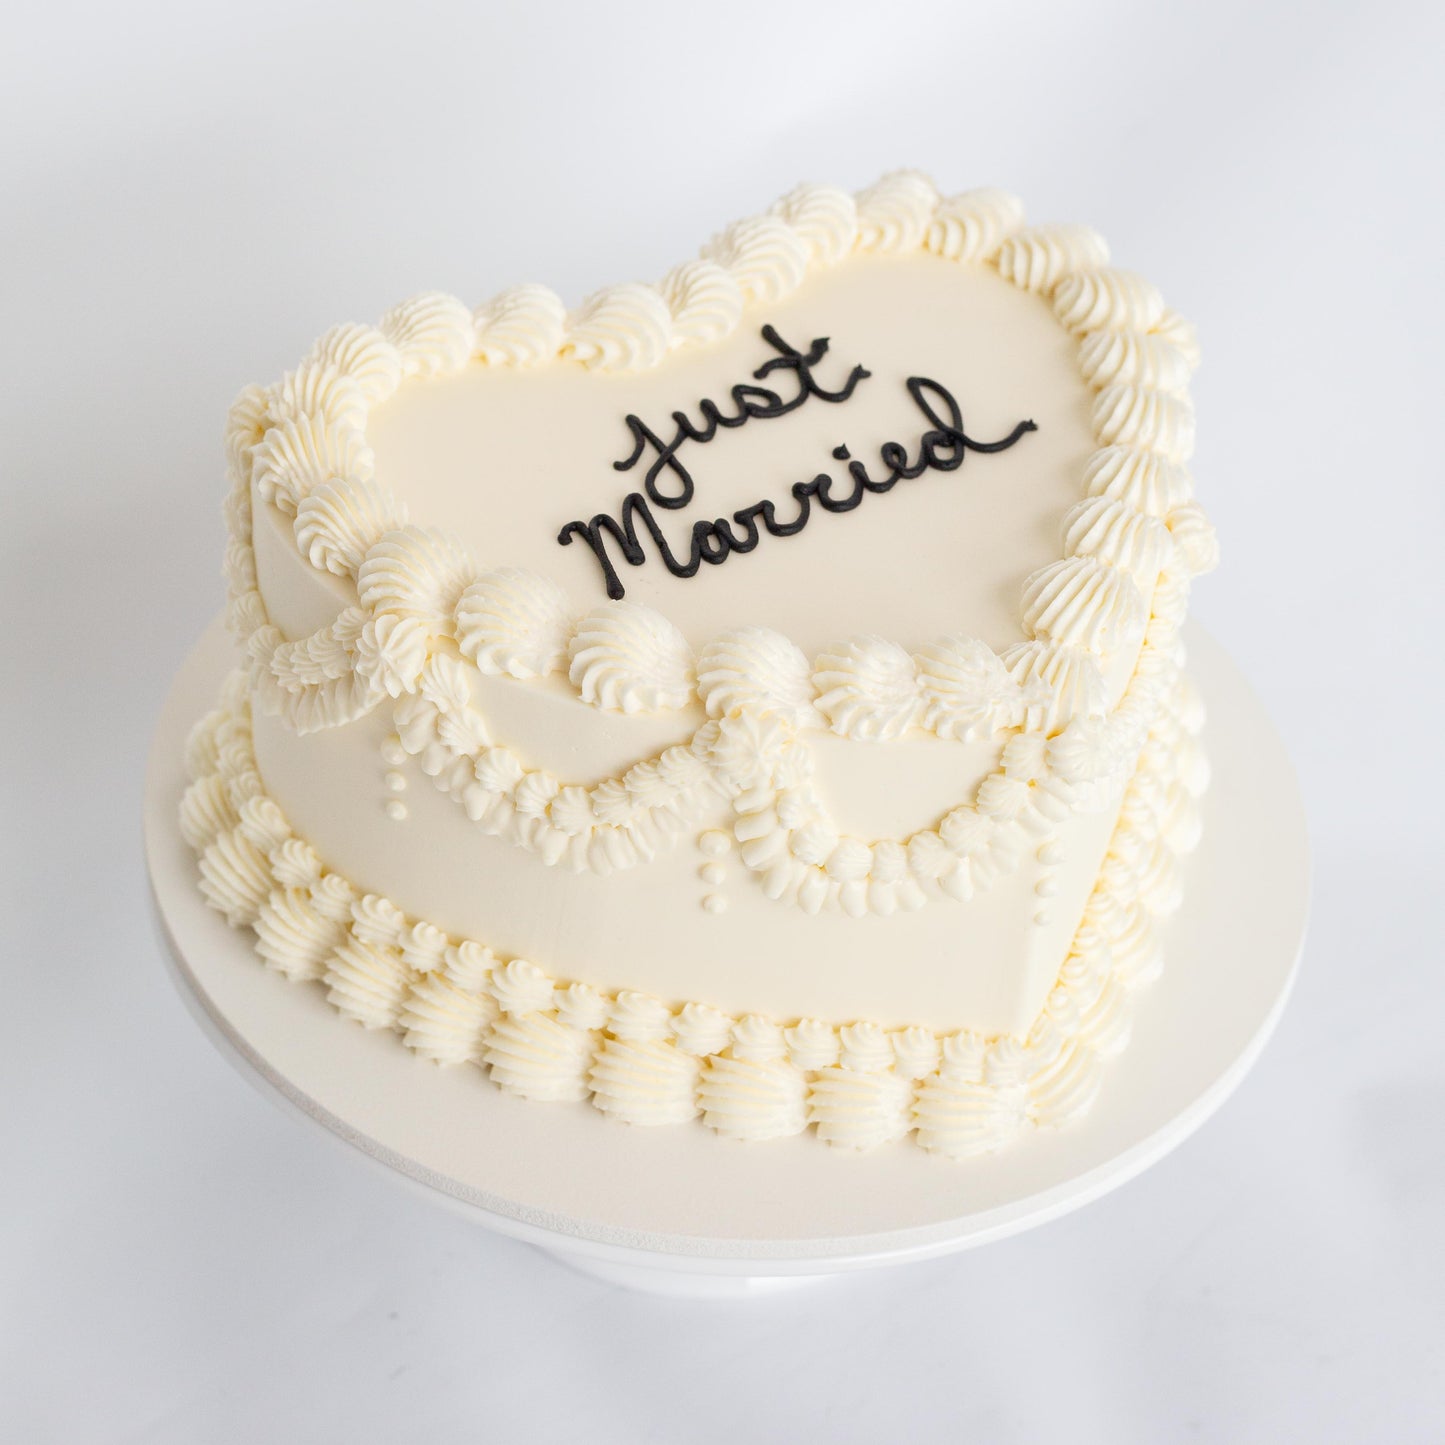
2. Frost Clean White Fondant


Smooth white fondant feels classic. It reflects light beautifully. It matches almost every theme. Keep the finish soft and matte instead of shiny. Sharp edges look modern. Slightly rounded edges feel romantic. Choose the tone carefully — bright white or ivory depending on your décor.
- Apply a crumb coat first.
- Roll fondant evenly to avoid thin patches.
- Use a fondant smoother for sharp sides.
- Trim excess carefully at the base.
- Let it set before adding décor.
Helpful note: Ivory often looks warmer under natural lighting.
Why couples love this: Clean fondant makes decorations pop without clutter.
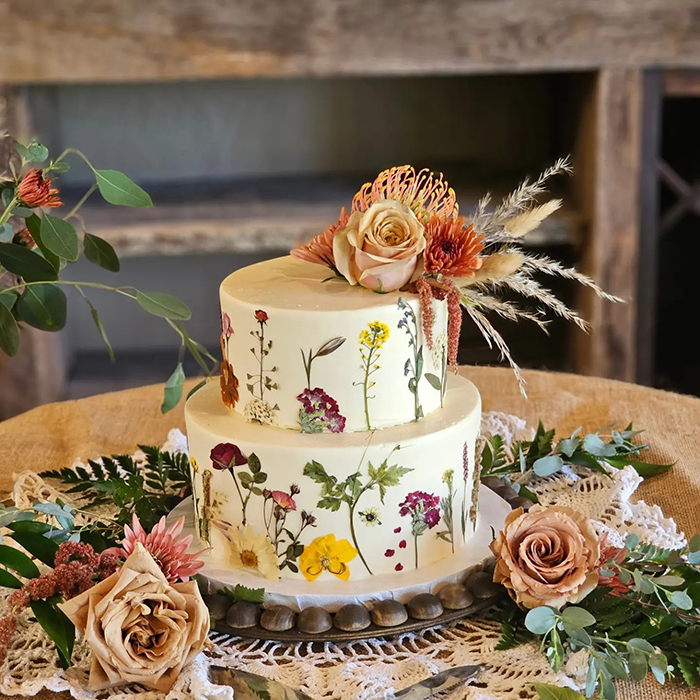
3. Add Fresh Flower Toppers


Fresh flowers instantly soften a cake. They connect it to your bouquet and table florals. Use blooms that match your wedding theme ideas for cohesion. Keep placement light and intentional. Too many flowers can hide the structure.
- Choose non-toxic, food-safe flowers.
- Wrap stems before inserting.
- Use odd-numbered clusters for balance.
- Match flower color to bouquet palette.
- Add greenery for depth.
Quick suggestion: Ask your florist for extra stems on the wedding morning.
Why it elevates the look: Flowers add romance without heavy decoration.
4. Insert Hidden Support Rods
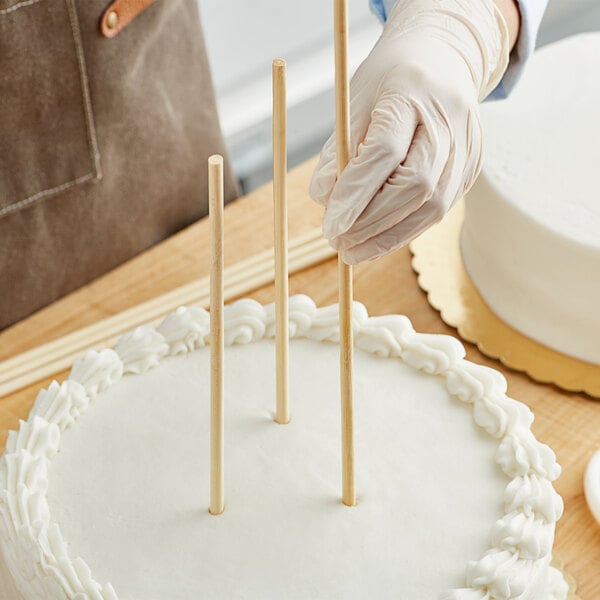


Support is invisible but essential. Without it, tiers sink or tilt. Food-safe dowels or rods hold the weight of upper layers. This step protects your cake during transport and display. Stability matters, especially for outdoor weddings.
- Cut dowels flush with cake height.
- Insert evenly across the base tier.
- Add a central dowel for tall cakes.
- Chill tiers before stacking.
- Transport tiers separately if possible.
Small reminder: Always test structure before decorating fully.
Why this matters: Strong support keeps the cake flawless until cutting time.
(If you’re planning desserts too, explore some classy cake ideas for design inspiration.)
5. Place Slim Gold Separator


A slim gold separator adds quiet luxury. It breaks up white layers without overpowering them. The detail feels subtle but refined. Metallic accents photograph beautifully under reception lighting.
- Use thin metallic cake boards.
- Keep gold tone consistent with décor.
- Avoid thick, bulky separators.
- Pair with minimal floral accents.
- Polish metallic surfaces before display.
Extra idea: Match gold to your cutlery or charger plates.
Why it enhances the style: Small metallic lines create dimension and elegance.
6. Wrap Satin Ribbon Trim
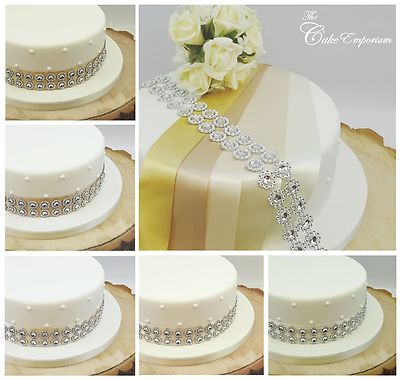


Satin ribbon around the base of each tier adds softness. It hides edges and adds color without heavy frosting details. Choose ribbon that matches bridesmaid dresses or table linens.
- Secure ribbon with edible glue.
- Keep ribbon width consistent.
- Avoid bulky knots.
- Choose matte satin for elegance.
- Test color in venue lighting.
Little styling thought: Pale blush or champagne ribbons feel timeless.
Why it looks refined: Fabric texture adds depth without visual clutter.
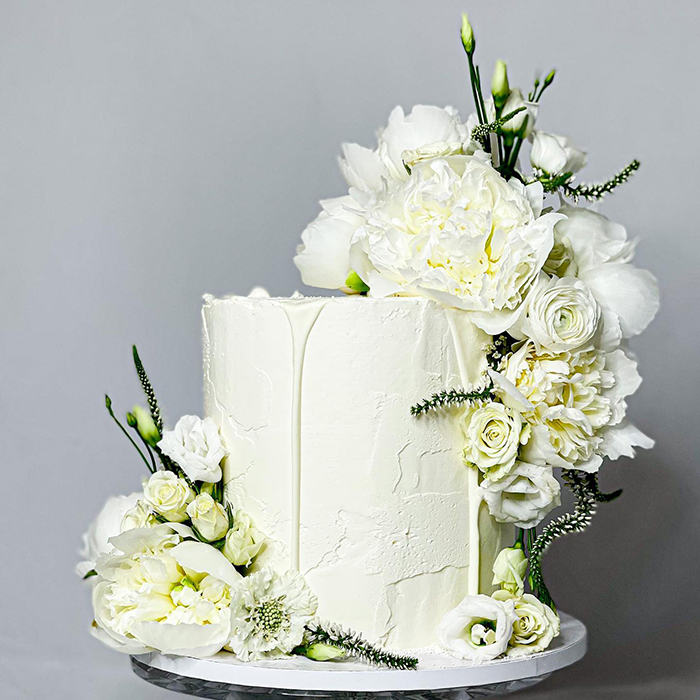
7. Add Cascading Greenery


Greenery flowing down one side creates movement. It feels organic and romantic. Eucalyptus and olive branches are popular choices. Keep the cascade asymmetrical for a modern look.
- Anchor greenery at top tier.
- Let it flow diagonally.
- Mix small and large leaves.
- Secure with floral pins.
- Keep one side clean.
Styling thought: Pair greenery with soft candles on the table.
Why it feels natural: Flowing leaves add life and gentle drama.
8. Position Cake Near Windows
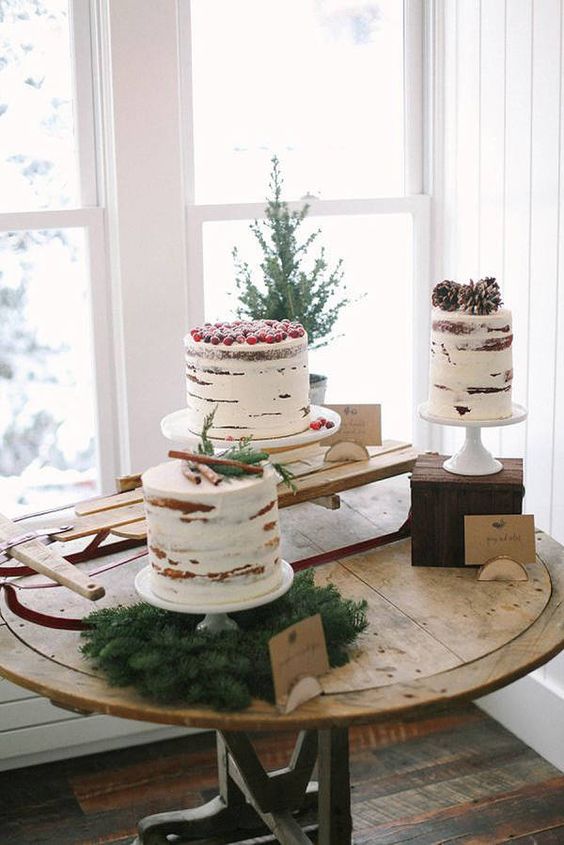


Light changes everything. Natural light makes fondant glow. It softens shadows. If possible, place the cake table near windows during daytime receptions.
- Avoid harsh direct sunlight.
- Keep cake slightly angled toward light.
- Use light curtains to diffuse brightness.
- Ensure table is stable.
- Clear background clutter.
Helpful hint: Visit the venue at the same time of day before deciding.
Why it photographs better: Natural light creates soft, flattering images.
9. Light Cake Spotlight Glow
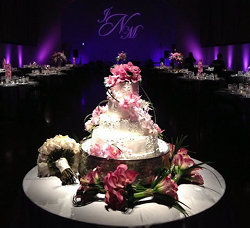

Evening weddings need focused lighting. A soft spotlight keeps the cake visible. Warm lighting feels romantic. Avoid colored lights that distort cake tones.
- Use warm LED uplights.
- Keep beam soft and diffused.
- Test lighting before guests arrive.
- Avoid overhead harsh lights.
- Position light slightly above eye level.
Quick tip: Ask your DJ about subtle lighting options.
Why this detail matters: Proper lighting keeps your cake stunning at night.
10. Frame Cake Photo Spot


Create a small backdrop behind the cake. A floral arch, fabric drape, or greenery wall works beautifully. It turns cake cutting into a highlight moment.
- Keep backdrop simple.
- Match it to your theme.
- Avoid busy patterns.
- Add candles for depth.
- Keep enough space for photos.
Extra idea: Use your ceremony florals again for sustainability.
Why it stands out: A framed cake becomes a natural photo station.
(For styling ideas, browse these creative cake table ideas.)
11. Style-Matching Dessert Table


Your 3 tier cake should connect with the dessert table. Colors, textures, and height variations matter. Keep spacing clean. Mix mini desserts but avoid crowding.
- Use different stand heights.
- Repeat cake colors subtly.
- Add soft linens.
- Keep desserts evenly spaced.
- Label flavors neatly.
Little styling thought: Macarons and cupcakes pair beautifully with tiered cakes.
Why it feels cohesive: Matching details create visual flow across the table.
12. Choose Timeless Round Shape

Round tiers feel classic and soft. They photograph well. They suit almost every venue. While square cakes feel modern, round shapes remain timeless.
- Keep edges clean and smooth.
- Choose subtle piping if desired.
- Avoid heavy patterns.
- Use symmetry in decoration.
- Keep top tier slightly smaller.
Small note: Round cakes are easier to cut evenly.
Why couples trust this choice: It never goes out of style.
13. Stack Symmetrical Proportions


Symmetry makes a cake look intentional. Keep tier heights similar. Most tiers are 4–6 inches tall. Avoid making one tier unusually tall unless it fits your design.
- Standard tier height: 4–5 inches.
- Keep height consistent.
- Ensure smooth vertical alignment.
- Avoid leaning tiers.
- Measure before stacking.
Helpful thought: Sketch proportions before baking.
Why it feels polished: Even proportions create calm, elegant lines.
Small Details Couples Often Overlook
- Skipping internal supports
- Overloading with flowers
- Mixing too many metallic tones
- Placing cake under harsh lighting
- Forgetting temperature control
- Using unstable cake tables
FAQs
Is a 3 tier cake enough for 100 guests?
Yes, usually. A standard 12”–9”–6” round cake serves about 100 guests depending on slice size. For larger crowds, add a kitchen sheet cake to ensure everyone gets dessert.
How tall should tiers be?
Most wedding cake tiers are 4 to 6 inches tall. Keeping them consistent helps the cake look balanced and elegant.
How to support stacked cakes?
Use food-safe dowels or support rods. Insert evenly across the bottom tiers and add a central dowel for extra stability.
Round or square tiers better?
Round tiers feel softer and timeless. Square tiers look modern and structured. Choose based on your overall theme.
Classic wedding cake shapes?
Round tiered cakes remain the most traditional shape. They pair beautifully with almost any décor style. You can explore traditional cake design ideas from trusted baking resources like Wilton and Brides for deeper inspiration.
Final Thoughts
A 3 tier wedding cake feels balanced, elegant, and timeless. When styled with care, it becomes a soft centerpiece that guests remember.
Focus on structure first. Then layer beauty. Keep proportions calm. Add subtle detail. And let lighting highlight your work.
For more inspiration on wedding menus and sweets, visit our full guide at /wedding/food/ and explore thoughtful dessert planning ideas.
Your cake deserves its moment. Make it count.
Focus Keyphrase:
3 tier wedding cake
Keyphrase Synonym (1):
three tier wedding cake
Related Keyphrase (1):
classic wedding cake design
Primary H1
3 Tier Wedding Cake Styling Guide for an Elegant Centerpiece
Alternative H1s (2–3)
• How to Style a 3 Tier Wedding Cake Like a Pro
• Elegant 3 Tier Wedding Cake Ideas That Feel Timeless
• Designing a Classic 3 Tier Wedding Cake Step by Step
Meta Titles (3)
- 3 Tier Wedding Cake Ideas for a Timeless Look
- How to Style a 3 Tier Wedding Cake Beautifully
- Elegant 3 Tier Wedding Cake Design Guide
Power Title (1)
The Secret to a Perfectly Styled 3 Tier Wedding Cake
Meta Description (155–158 chars)
Discover how to style a 3 tier wedding cake with balanced tiers, elegant details, and photo-ready placement that transforms your dessert into a true focal point.
High CTR Slug / URL
3-tier-wedding-cake-ideas
3 Variations:
• elegant-3-tier-wedding-cake
• style-3-tier-wedding-cake
• timeless-3-tier-wedding-cake
Intro Paragraph (70–80 words)
The room goes quiet for a second.
All eyes turn to the cake.
That is the power of a beautifully styled 3 tier wedding cake. It is more than dessert. It is a statement piece that ties your theme together and becomes the center of countless photos. If you want a cake that feels balanced, elegant, and unforgettable, this guide shows you exactly how to design it with intention and confidence.
Conclusion Paragraph (65–70 words)
A thoughtfully styled 3 tier wedding cake brings calm elegance to your reception space. When the tiers are balanced, the details refined, and the lighting soft, the cake becomes part of the story you are telling. Keep your design cohesive and intentional. For more inspiration on coordinating your celebration details, explore more ideas at /wedding/planning/ and continue shaping a wedding that feels beautifully yours.